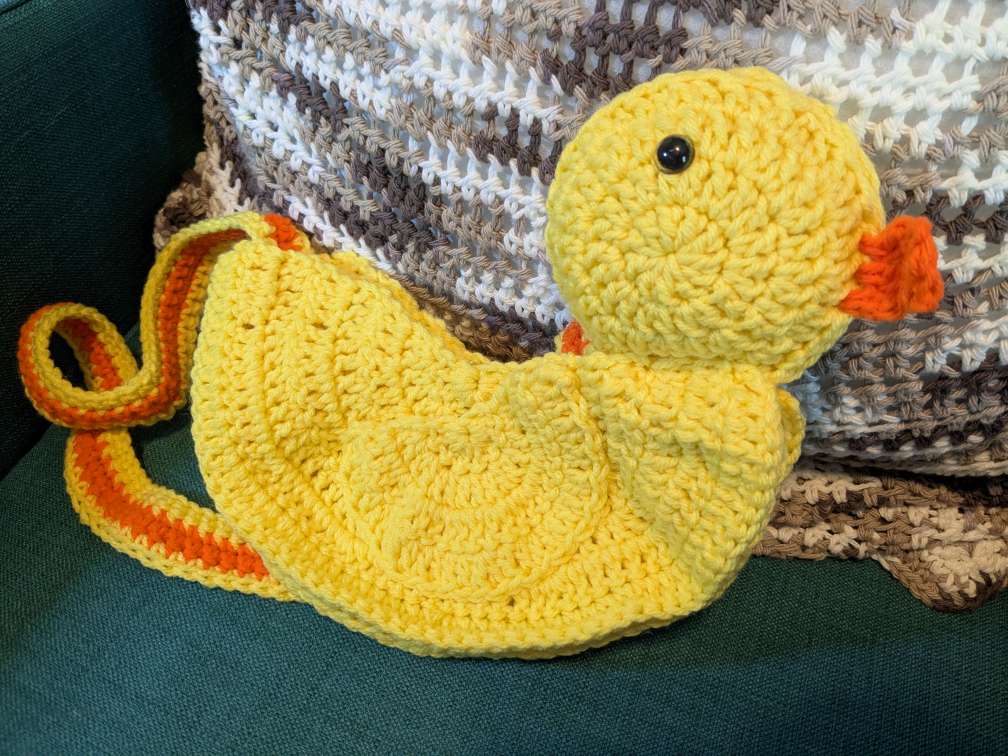
Materials
Here’s what you’ll need to make your rubber ducky purse:
- Yarn:
- Mainstays 100% acrylic in yellow and orange (or any worsted-weight yarn in these colors).
- Hook: 5mm (H/8)
- Notions:
- Yellow thread and sewing needle
- Yarn needle
- Safety eyes and backs
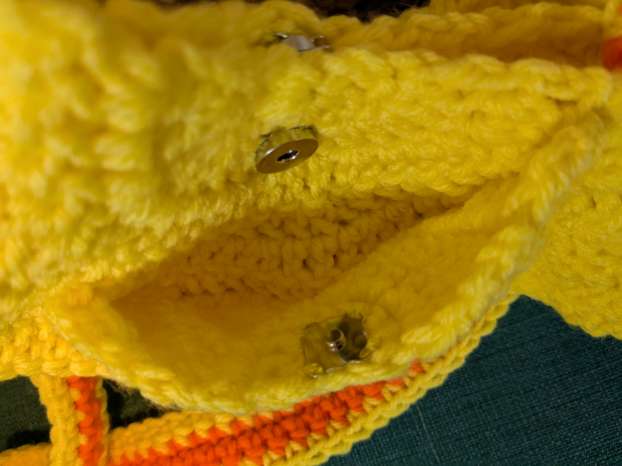
- Magnetic snap buttons (sew-on type)
- A small amount of stuffing (for the ducky’s head)


Pattern Abbreviations
Before we begin, here’s a quick reference for the crochet abbreviations used in this pattern:
- Ch: Chain
- SC: Single Crochet
- DC: Double Crochet
- St: Stitch
- Slst: Slip Stitch
- FLO: Front loops only
- BLO: Back loops only
- YO: Yarn over
Finished Size
you can adjust the strap length as needed
Instructions
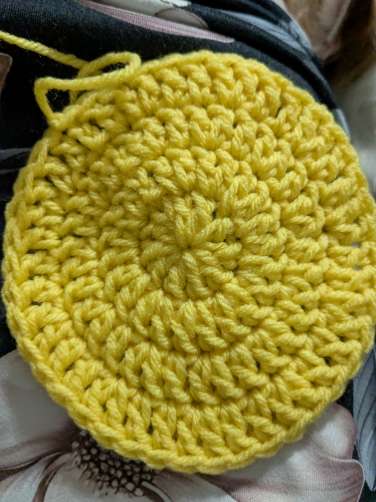
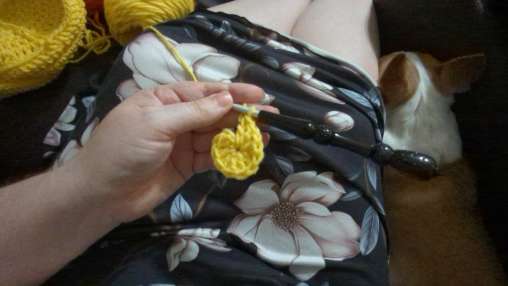
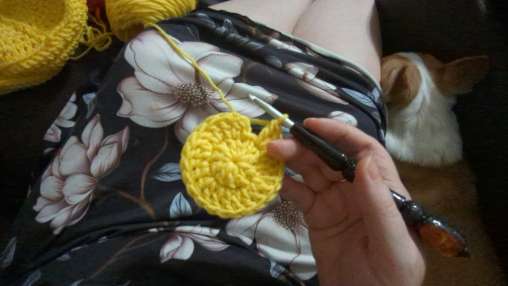
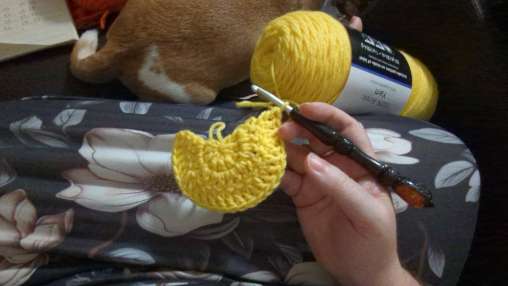
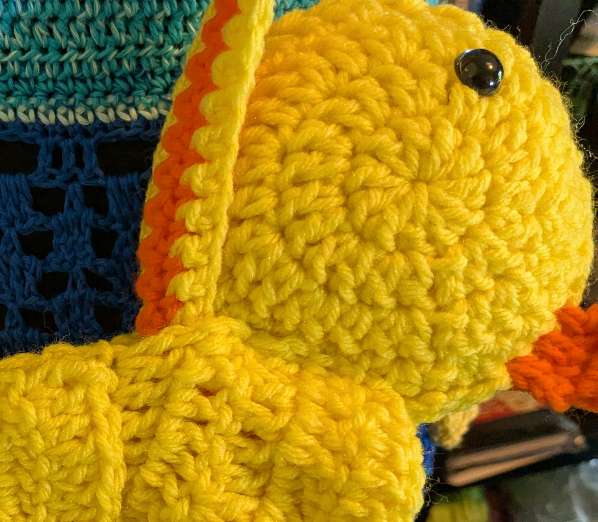
Main Body (Make 2 in Yellow)
Row 1:
- Ch 3.
- Work 8 DC into the foundation stitch. (8 sts)
Row 2:
- Ch 2, turn.
- Work 2 DC in each stitch around. (16 sts)
Row 3:
- Ch 2, turn.
- 1 DC in the first stitch, 2 DC in the next stitch. Repeat around. (24 sts)
Row 4:
- Ch 2, turn.
- 2 DC, 2 DC in the next stitch. Repeat around. (32 sts)
Row 5:
- Ch 2, turn.
- 3 DC, 2 DC in the next stitch. Repeat around. (40 sts)
Row 6:
- Ch 2, turn.
- 4 DC, 2 DC in the next stitch. Repeat around. (48 sts)
Row 7:
- Ch 2, turn.
- 5 DC, 2 DC in the next stitch. Repeat around. (48 sts)
Row 8:
- Ch 2, turn.
- Working in BLO, 6 DC, 2 DC in the next stitch. Repeat around.
- Turn and work in FLO, DC in each stitch around.
- Fasten off, leaving a long tail for sewing. (56 sts)


Wing Pockets (Make 2)
Repeat Rows 1–4 of the Main Body pattern to create two wing pockets.
Head (Make 2)
Round 1:
- Ch 3.
- Work 10 DC into the foundation stitch. Slst to the top of the Ch 3. (10 sts)
Round 2:
- Ch 2.
- Work 2 DC in each stitch around. Slst together. (20 sts)
Round 3:
- Ch 2.
- 1 DC in the first stitch, 2 DC in the next stitch. Repeat around. Slst together. (30 sts)
Round 4:
- Ch 2.
- 2 DC, 2 DC in the next stitch. Repeat around. Slst together. (40 sts)
- Fasten off, leaving a long tail for sewing
Beak (In Orange)
- Fasten on the orange yarn about three stitches below the middle of the face.
- Ch 2, then DC in the same stitch.
- Work 2 DC in the next two stitches.
- Ch 2 and turn.
- Work 2 DC decreases twice (see pattern abbreviations for how-to).
- Fasten off and weave in ends
Strap
- With yellow yarn, Ch 151 (or longer if desired).
- Turn and SC across, working in BLO.
- Switch to orange yarn:
- Row 2: Ch 1, turn. SC across.
- Row 3: Ch 1, turn. SC across. Fasten off orange.
- Switch back to yellow:
- Ch 1, turn. SC across.
- Fasten off, leaving a long tail for sewing
Assembly
- Sew the Body: Line up the two main body pieces and sew them together along the FLO row
- Attach the Straps: Sew the straps to the interior of the purse
- Add the Head: Sew the head to the body, stuffing it lightly before closing
- Attach the Wings: Sew the wing pockets to either side of the body
- Secure the Snap Buttons: Sew the magnetic snaps to the interior of the pockets and main body
Tips for Beginners
- Take Your Time: If you’re new to crochet, practice the stitches (like DC and BLO/FLO) on a small swatch first.
- Safety Eyes: Attach these before sewing the head closed to ensure they’re secure.
- Adjust the Strap: Make it longer or shorter to suit your preference
Congratulations
You’ve just crocheted your very own rubber ducky purse! This cheerful little bag is perfect for holding small essentials or brightening someone’s day as a handmade gift. Share your finished creation with us—we’d love to see it!