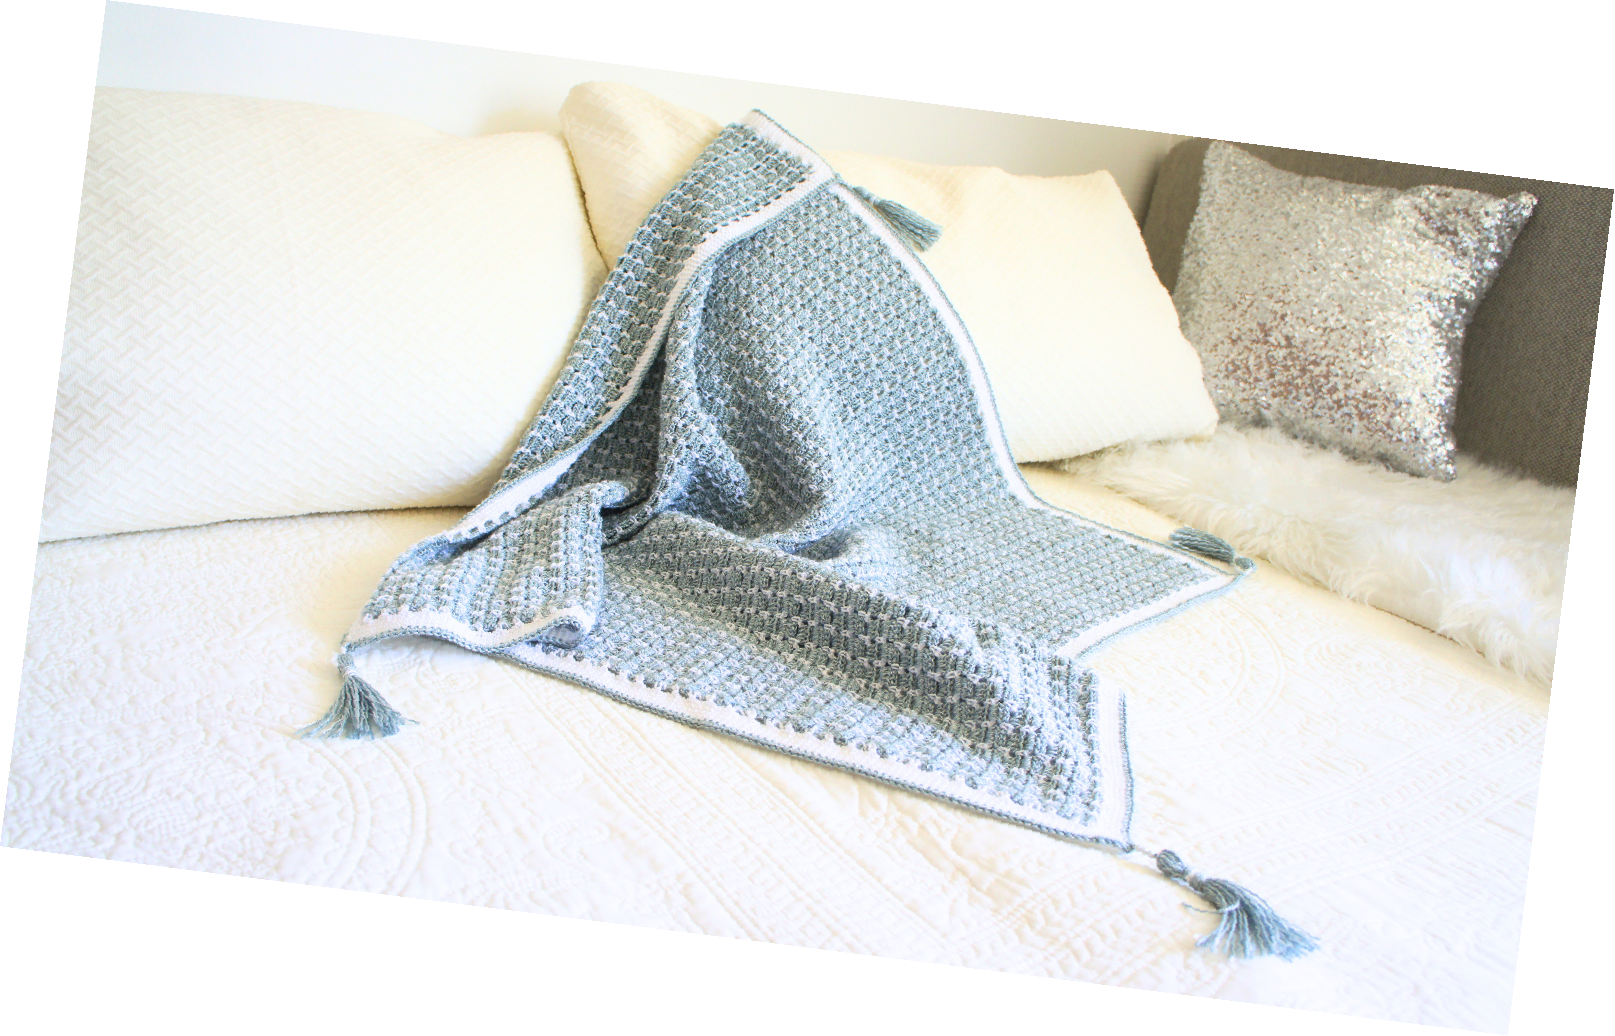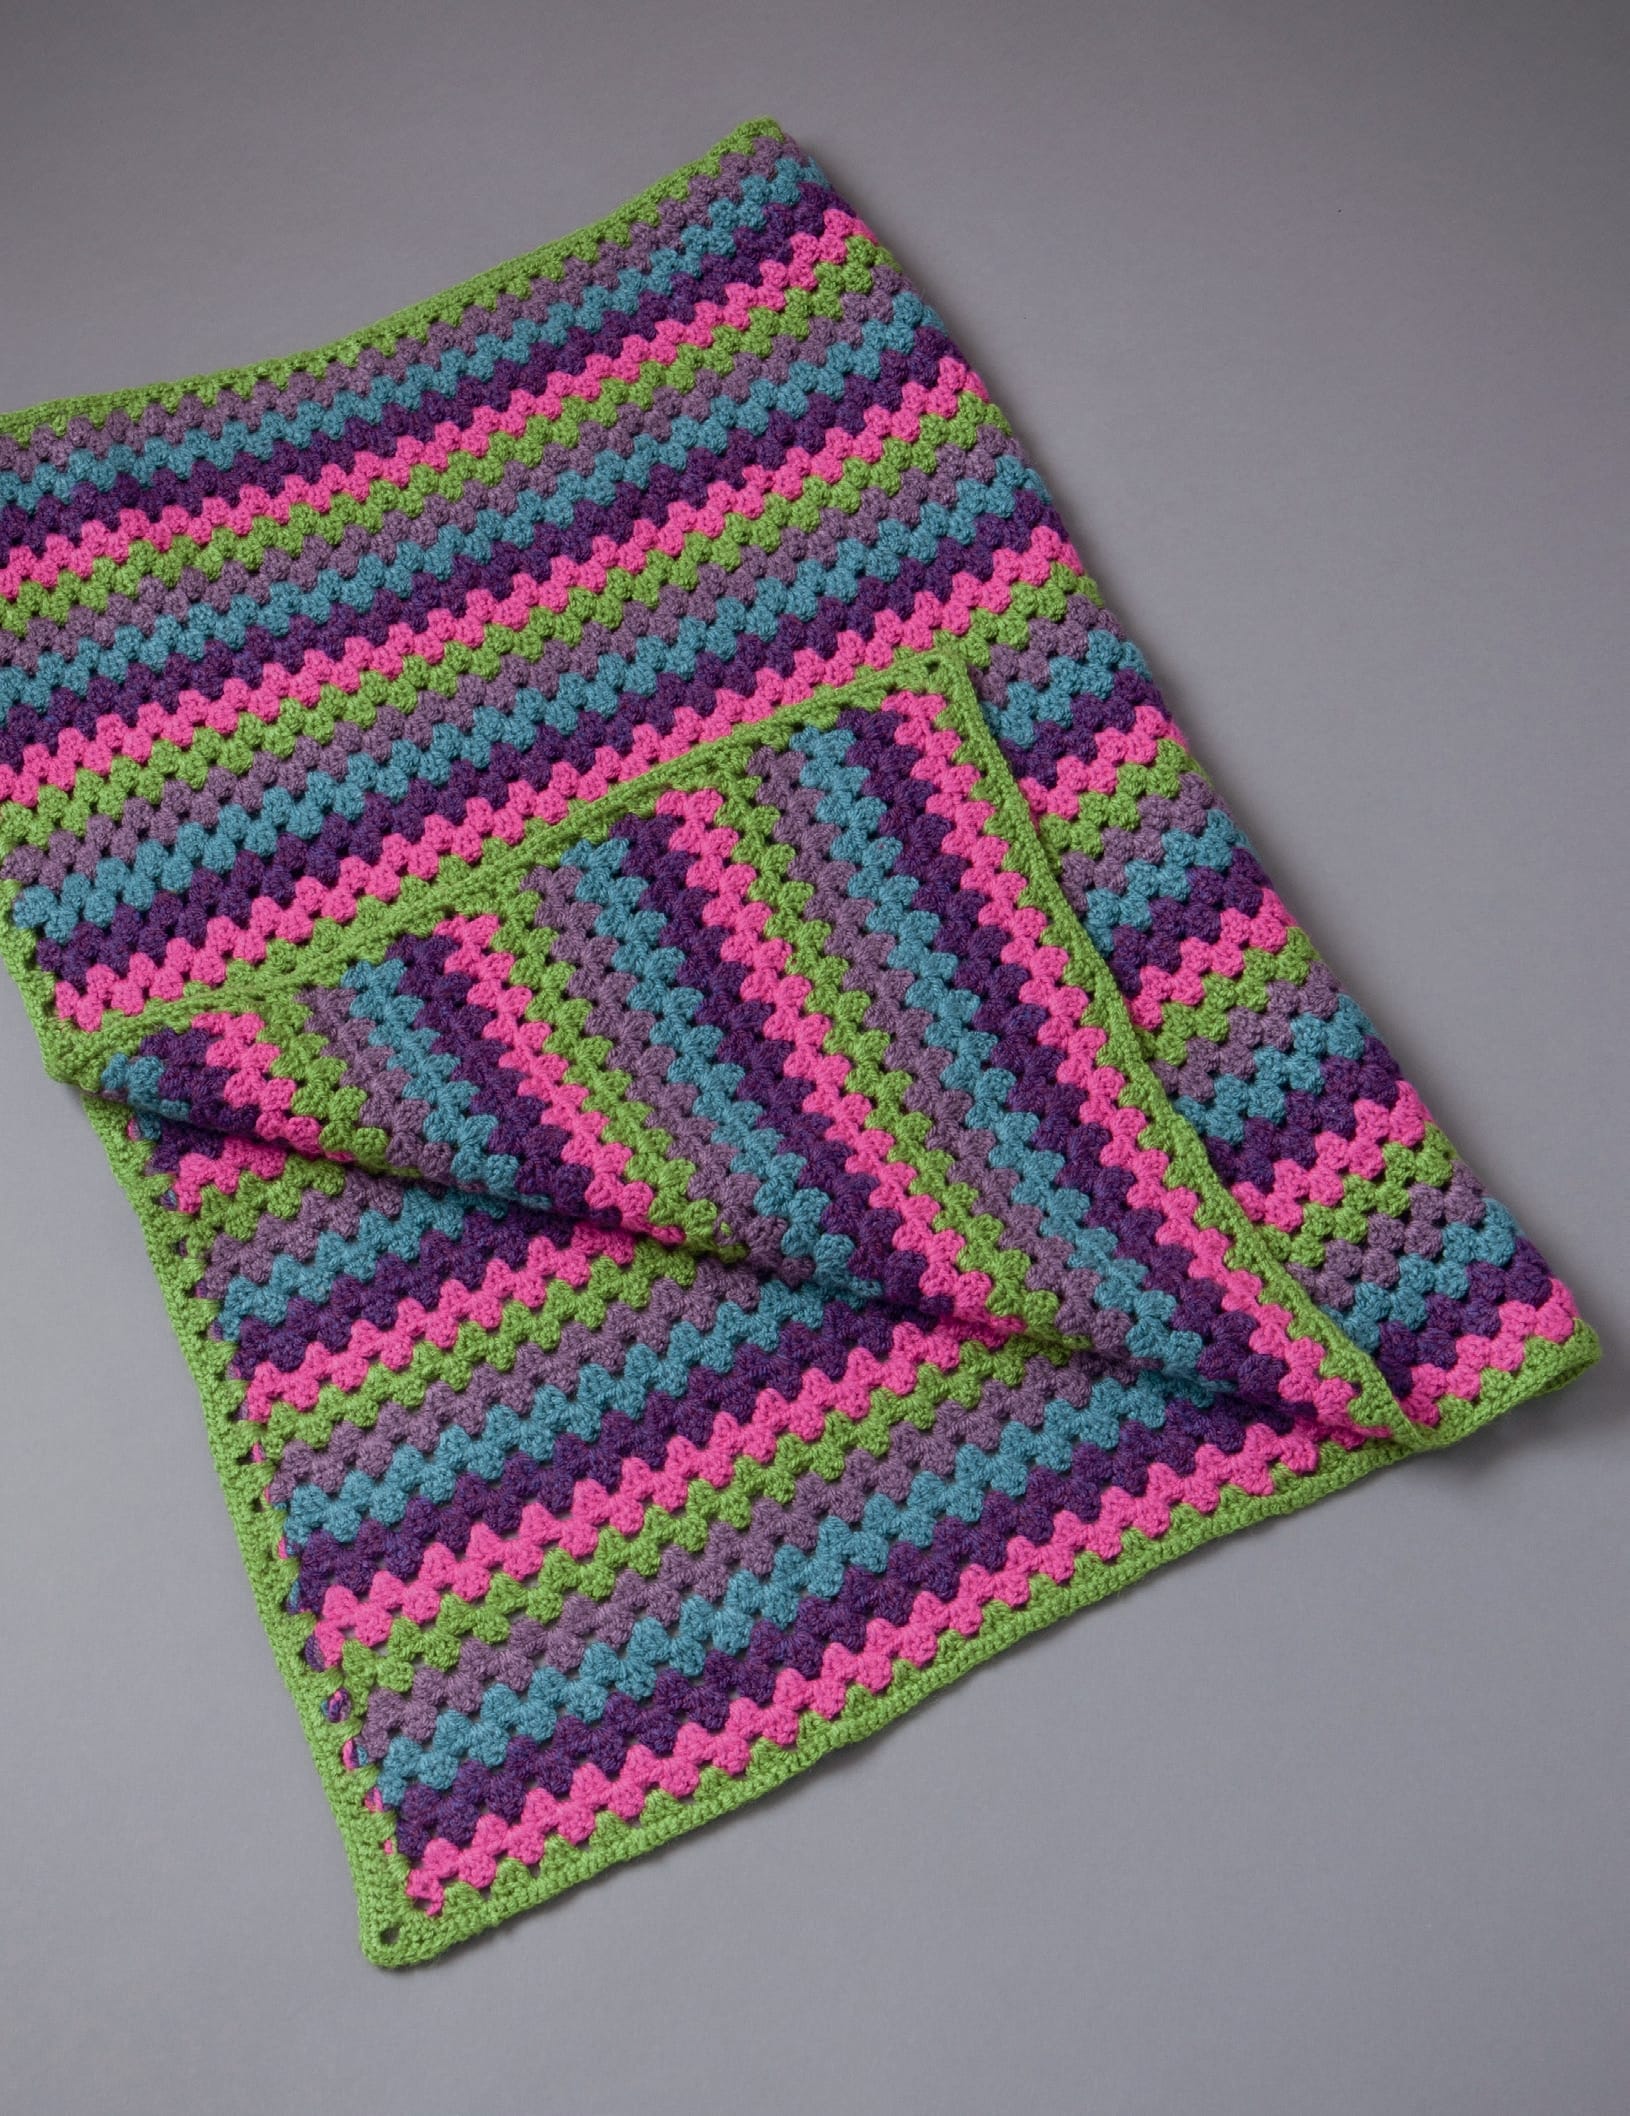
How to Crochet a Cozy Granny Striped Blanket
There’s something magical about curling up under a handmade blanket—especially one you’ve stitched yourself! Today, I’m sharing a cheerful Granny Striped Blanket pattern that’s perfect for beginners. With its bold stripes and soft texture, this blanket is a joyful project that works up quickly and looks stunning in any color combo.
Whether you’re new to crochet or just want a relaxing make, this pattern uses only basic stitches (hello, double and treble crochet!) and lets you play with your favorite hues. The finished blanket measures 100cm wide x 72cm long (about 39″ x 28″), but you can easily adjust the length to suit your needs.
Why you’ll love this pattern:
- Great for gifting: Customize colors to match a friend’s décor!
- Mindful making: Repetitive rows make it a calming project.
- Skill-building: Master tension and color changes with ease.
Grab your hook, pick some happy yarn, and let’s dive in!
Materials
- Yarn: Women’s Institute Premium Acrylic (or any DK-weight yarn) in 5 colors:
- Lime
- Pink
- Mixed (variegated)
- Teal
- Light Purple (x2 balls)
- Hook: 4mm (US G/6)
- Tools: Tapestry needle, scissors
- Optional: Cool iron for pressing
Abbreviations (UK Terms)
- ch: Chain
- sl st: Slip stitch
- dc: Double crochet
- tr: Treble crochet
- rem: Remaining
Note: In US terms, “dc” (UK) = “sc” (US), and “tr” (UK) = “dc” (US).
Finished Size
As photographed: 100cm (width) x 72cm (length). Adjust by adding more rows!
Instructions
Starting Your Blanket
- Foundation Chain:
- Chain 180 stitches + 2 (turning chain). *This equals a multiple of 3 + 2 extra chains.*
- Row 1 (Base Row):
- Dc into the 2nd chain from your hook.
- Continue placing 1 dc into each chain across. Turn.
Creating the Granny Stripes
- Row 2 (First Stripe):
- Ch 3 (counts as 1 tr).
- Work 1 tr into the same stitch as your chain-3.
- Skip 2 stitches, then work 3 tr into the next stitch.
- Repeat *** to *** across until 2 stitches remain.
- Skip 2 sts, work 2 tr into the last dc. Turn.
- Row 3 (Second Stripe):
- Ch 3. Now, work 3 tr into each space between the tr groups from Row 2.
- At the end, work 1 tr into the last stitch.
- Fasten off and change colors!
Continuing the Pattern
- Repeat Rows 2 and 3 alternately, switching colors every 2 rows.
- Follow the suggested color order: Lime → Light Purple → Teal → Mixed → Pink, then repeat!
- Keep going until your blanket reaches 72cm long (or your desired length).
Finishing Touches
- Border (Optional):
- Using Lime yarn, work 1 dc into every stitch around the blanket.
- At each corner, chain 3 to create a neat turn.
- Weaving in Ends:
- Thread loose yarn tails with a tapestry needle and weave them into the blanket’s stitches. Snip excess.
- Final Press:
- Gently press with a cool iron to smooth out any wrinkles.
Tips for Beginners
- Tension Trouble? If your edges wobble, count stitches at the end of each row to stay consistent.
- Color Play: Arrange yarn balls in your chosen order to avoid tangles.
- Take Breaks: Crochet is meant to be relaxing—stretch your hands and enjoy the process!
Final Thoughts
This Granny Striped Blanket is a fantastic way to practice stripes and basic stitches while creating something cozy and practical. Whether you keep it for yourself or gift it to someone special, it’s sure to brighten any space.