Fresh Mesh Crochet Tote Bag: A Perfect Beginner-Friendly Project
Part 2: The Second Side
(Here’s the cool part—you’ll work into the other side of the foundation chain!)
- Flip your work and attach yarn:
- With the Right Side (RS) facing, join yarn with a sl st to the first unused loop of your starting chain.
- Repeat the same mesh pattern:
- Work Row 1 as before (dc stitches with ch-2 spaces).
- Continue until the Second Side matches the First Side in length.
- Fasten off.
Part 3: Making the Straps (x2)
- Chain 93 (this makes a nice long strap).
- First round:
- 1 hdc in the 3rd ch from hook.
- 1 hdc in each ch to the last ch.
- Work 5 hdc in the last ch (this creates a rounded end).
- Now, work along the opposite side of the chain:
- 1 hdc in each ch until the last one.
- Work 3 hdc in the last ch.
- Join with a sl st to the top of the starting ch-2.
- Second round:
- Sl st in each hdc around to smooth the edges.
- Fasten off.
Finishing Your Tote Bag
- Sew the side seams:
- Fold the bag along the foundation chain (so both sides meet).
- With RS facing, join yarn at the top edge.
- Sc along the side to seam it together.
- Repeat on the other side.
- Attach the straps:
- Sew the straps about 3½” (9 cm) from the side seams for balance
Tips for Beginners
✔ Counting stitches is key! Use stitch markers to keep track of your mesh pattern.
✔ If your edges curl, block the bag lightly with steam.
✔ Want a sturdier base? Add a fabric liner
Final Thoughts
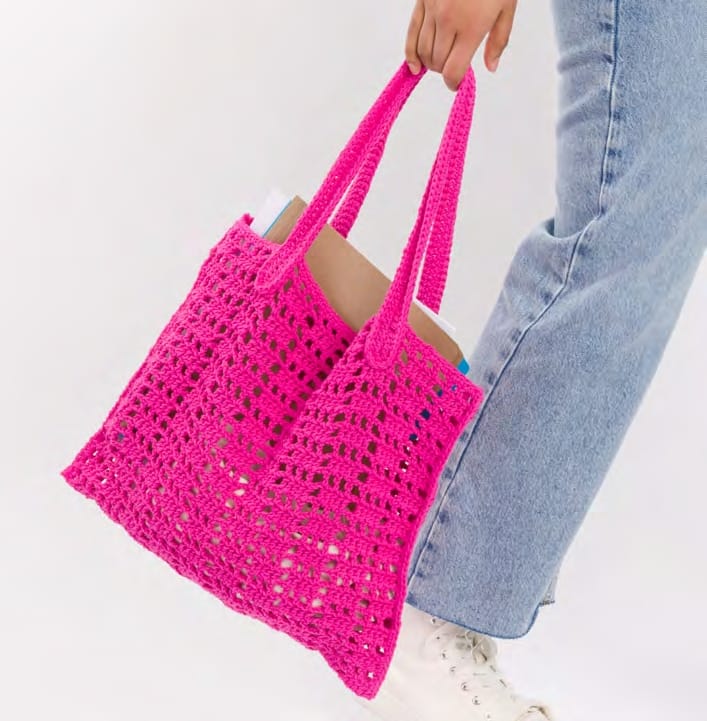
And there you have it—a bright, breezy, and beginner-friendly tote ready for all your adventures! This project is great for practicing basic stitches, and the mesh design makes it work up fast.
Will you be making one for yourself or gifting it? Tag me on social if you share your finished bag—I’d love to see your creations!
Pages: 1 2