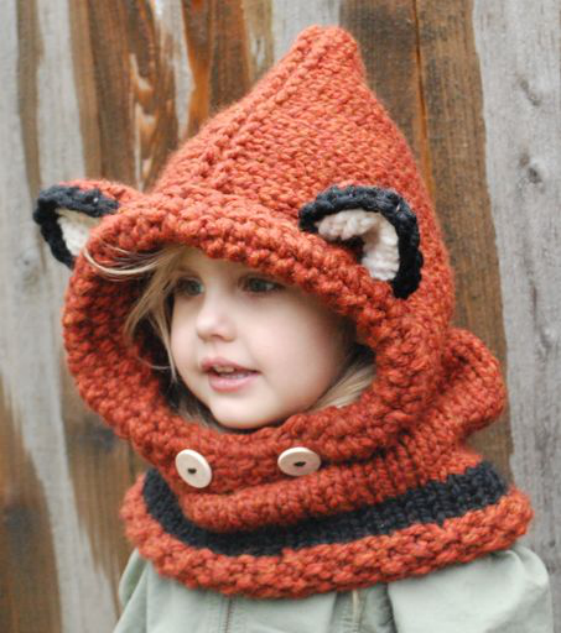
Failynn Fox Cowl Knitting Pattern
Materials
To create your cozy Failynn Fox Cowl, gather the following knitting and crochet supplies:
- Knitting Needles:
- U.S. 15 (10 mm) 24-inch circular needle (for adult size)
- U.S. 13 (9 mm) 24-inch circular needle (for teen, child, toddler, 12/18 months sizes)
- U.S. 11 (8 mm) double-pointed needles (for knitting ears)
- Crochet Hook: U.S. size M/13 – 9 mm
- Yarn (Super Bulky Weight): Lion Brand Wool-Ease Thick & Quick is recommended.
- Main Color:
- 110 yards (for 12/18 months size)
- 125 yards (for toddler size)
- 160 yards (for child size)
- 210 yards (for teen/adult sizes)
- Contrast Color (for band, outside of ear): 30 yards
- Inner Ear Color: 15 yards
- Main Color:
- Notions:
- Tapestry needle (for attaching ears and weaving in ends)
- 2 x 1-inch buttons
Abbreviations
Familiarize yourself with these standard knitting and crochet abbreviations used in this pattern:
- ch: Chain
- K: Knit
- Kfb: Knit front and back (increase)
- K2tog: Knit two together (decrease)
- P: Purl
- P2tog: Purl two together (decrease)
- psso: Pass slipped stitch over
- sc: Single crochet
- sl st: Slip stitch
- st(s): Stitch(es)
- turn: Turn your work (when working in rows)
Gauge
Achieving the correct gauge is essential for the finished size of your cowl.
- Approx. 2.5 stitches = 1 inch
Finished Sizes
This versatile fox cowl pattern can be made in a range of sizes. The hood length measurements provided are approximate for each age group:
- 12/18 Months: Hood measures 9.5 inches
- Toddler (2T-4T): Hood measures 10.5 inches
- Child (5-8): Hood measures 12.5 inches
- Teen: Hood measures 14 inches
- Adult: Hood measures 15 inches
Instructions for the Failynn Fox Cowl
The cowl is worked from the bottom up, primarily in the round for the cowl body, then in rows for the hood.
Cowl Body
Casting On
Using the appropriate circular needle for your chosen size, cast on the following number of stitches:
- Adult: Cast on 57 sts with U.S. 15 (10 mm) 24-inch circular needle.
- Teen / Small Adult: Cast on 57 sts with U.S. 13 (9 mm) 24-inch circular needle.
- Child (5-8): Cast on 53 sts with U.S. 13 (9 mm) 24-inch circular needle.
- Toddler (2T-4T): Cast on 49 sts with U.S. 13 (9 mm) 24-inch circular needle.
- 12/18 Months: Cast on 45 sts with U.S. 13 (9 mm) 24-inch circular needle.
Place a stitch marker and carefully join your work to begin knitting in the round, ensuring your stitches are not twisted.
Seed Stitch Section (Main Color)
Work the seed stitch for the specified number of rounds for your size. In seed stitch, you alternate knits and purls.
- Round 1: K1, P1 all around.
- Subsequent Rounds: Knit all purl stitches and purl all knit stitches.
Continue for:
- 4 rounds: (12/18 months size)
- 5 rounds: (toddler/child sizes)
- 6 rounds: (teen/adult sizes)
Contrast Band (Contrast Color)
Switch to your contrast color yarn for the decorative band around the bottom of the cowl. Knit all stitches in each round.
- 3 rounds: (12/18 months size)
- 4 rounds: (toddler/child sizes)
- 5 rounds: (teen/adult sizes)
Main Cowl Section (Main Color)
Switch back to your main color yarn. Knit every round for the following number of rounds:
- 20 rounds: (teen/adult sizes)
- 17 rounds: (child size)
- 14 rounds: (toddler size)
- 11 rounds: (12/18 months size)
Decrease Rounds
These rounds shape the cowl and prepare for the hood section.
- First Decrease Round: For all sizes, work one round as follows: knit 2 together once, then knit all remaining stitches in the round. This single decrease will ensure you have an even number of stitches for the next decrease round.
- Second Decrease Round: Follow the specific decrease pattern for your size, repeating the sequence until the end of the round.
- Adult Sizes: (K12, K2tog) all around (you will have 52 stitches remaining)
- Child Sizes: (K11, K2tog) all around (you will have 48 stitches remaining)
- Toddler Sizes: (K10, K2tog) all around (you will have 44 stitches remaining)
- 12/18 Months: (K9, K2tog) all around (you will have 40 stitches remaining)
Hood Construction
You will now work the hood back and forth in rows on the remaining stitches, creating an open front.
- Adult: 52 stitches
- Child: 48 stitches
- Toddler: 44 stitches
- 12/18 Months: 40 stitches
Teen/Adult Hood
Work these two rows repeatedly until your hood piece reaches the desired length:
- Row 1: K1, P1, K1, P1, K1, P1, K1, knit to last 7 stitches, then K1, P1, K1, P1, K1, P1, K1. Turn your work.
- Row 2: K1, P1, K1, P1, K1, P1, K1, purl to last 7 stitches, then K1, P1, K1, P1, K1, P1, K1. Turn your work.
Continue repeating Rows 1 & 2 until the hood measures:
- 14 inches: (for Teen size)
- 15 inches: (for Adult size)
Child/Toddler Hood
Work these two rows repeatedly until your hood piece reaches the desired length:
- Row 1: K1, P1, K1, P1, K1, knit to last 5 stitches, then K1, P1, K1, P1, K1. Turn your work.
- Row 2: K1, P1, K1, P1, K1, purl to last 5 stitches, then K1, P1, K1, P1, K1. Turn your work.
Continue repeating Rows 1 & 2 until the hood measures:
- 10.5 inches: (for Toddler size)
- 12.5 inches: (for Child size)
12/18 Months Hood
Work these two rows repeatedly until your hood piece reaches the desired length:
- Row 1: K1, P1, K1, P1, knit to last 4 stitches, then P1, K1, P1, K1. Turn your work.
- Row 2: K1, P1, K1, P1, purl to last 4 stitches, then P1, K1, P1, K1. Turn your work.
Continue repeating Rows 1 & 2 until the hood measures:
- 9.5 inches: (for 12/18 months size)
Finishing the Hood
Bind off all stitches on your hood. Fold the hood piece in half and stitch the top seam together from the inside. A mattress stitch is recommended for a neat, invisible seam.
Crochet Edge for the Hood Front
With your U.S. M/13 – 9 mm crochet hook, add a neat edge to the front opening of your hood.
- Make a slip stitch in the first stitch at the bottom center of the hood.
- Chain 1 (this counts as your first single crochet).
- Work a single crochet (sc) in every other stitch all around the front opening of your hood.
- Slip stitch (sl st) into your first single crochet to join the round.
- Chain 1 (this counts as your first single crochet).
- Work a single crochet (sc) in each single crochet all around the hood.
- Slip stitch (sl st) into the first single crochet to join the round.
- Break yarn and weave in all loose ends.
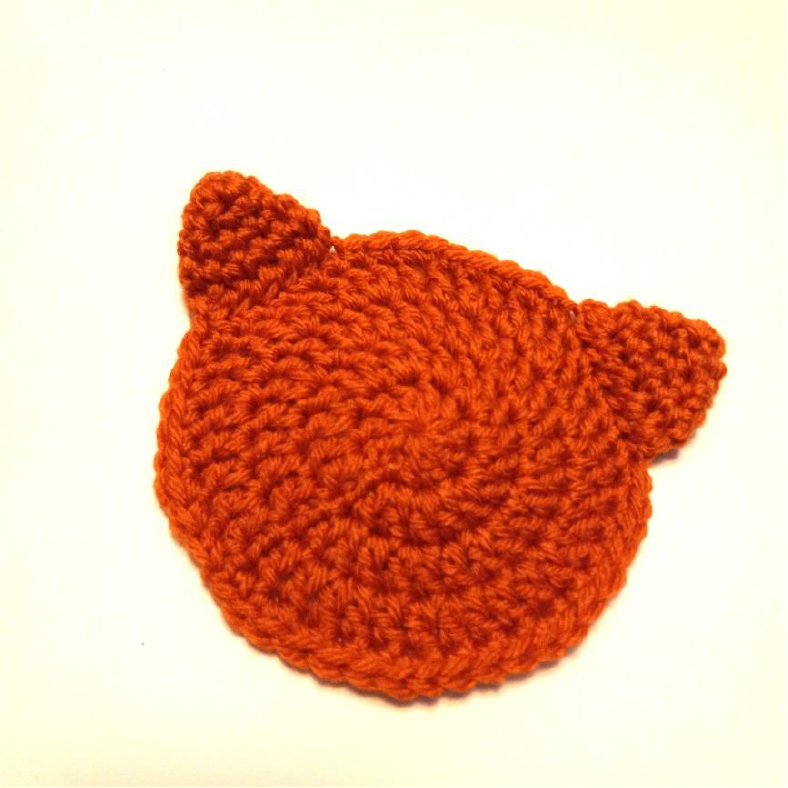
Fox Ears (Make 2)
These ears are knitted in one piece using U.S. 11 (8 mm) double-pointed needles, then folded in half to create the shape. The main color section (e.g., orange spice) will be slightly larger than the contrast color section (e.g., white).
Teen/Adult Ears
Using two U.S. 11 double-pointed needles, cast on one stitch in your main color (e.g., orange spice).
- Row 1: Kfb (2 sts)
- Row 2: Kfb (4 sts)
- Row 3: Kfb, P2, Kfb (6 sts)
- Row 4: Kfb, K4, Kfb (8 sts)
- Row 5: Kfb, P6, Kfb (10 sts)
- Row 6: Knit
- Row 7: Purl
- Row 8: Knit
- Row 9: Purl
- Row 10: Knit
- Row 11: Purl
- Row 12: Purl
Change to your contrast color (e.g., white).
- Row 13: Purl
- Row 14: Knit
- Row 15: Purl
- Row 16: Knit
- Row 17: Purl
- Row 18: Knit
- Row 19: Purl
- Row 20: K2tog, K6, K2tog (8 sts)
- Row 21: P2tog, P4, P2tog (6 sts)
- Row 22: K2tog, K2, K2tog (4 sts)
- Row 23: K2tog, K2tog (2 sts)
- Row 24: Slip 1, psso (1 st remaining)
Break yarn and draw it through the remaining stitch to secure. Make a second identical ear.
Child/Toddler Ears
Using two U.S. 11 double-pointed needles, cast on one stitch in your main color (e.g., orange spice).
- Row 1: Kfb (2 sts)
- Row 2: Kfb (4 sts)
- Row 3: Kfb, P2, Kfb (6 sts)
- Row 4: Kfb, K4, Kfb (8 sts)
- Row 5: Purl
- Row 6: Knit
- Row 7: Purl
- Row 8: Knit
- Row 9: Purl
- Row 10: Purl
Change to your contrast color (e.g., white).
- Row 11: Purl
- Row 12: Knit
- Row 13: Purl
- Row 14: Knit
- Row 15: Purl
- Row 16: K2tog, K4, K2tog (6 sts)
- Row 17: P2tog, P2, P2tog (4 sts)
- Row 18: K2tog, K2tog (2 sts)
- Row 19: Slip 1, psso (1 st remaining)
Break yarn and draw it through the remaining stitch to secure. Make a second identical ear.
12/18 Months Ears
Using two U.S. 11 double-pointed needles, cast on one stitch in your main color (e.g., orange spice).
- Row 1: Kfb (2 sts)
- Row 2: Kfb (4 sts)
- Row 3: Kfb, K2, Kfb (6 sts)
- Row 4: Purl
- Row 5: Knit
- Row 6: Purl
- Row 7: Knit
- Row 8: Purl
- Row 9: Purl
Change to your contrast color (e.g., white).
- Row 10: Purl
- Row 11: Knit
- Row 12: Purl
- Row 13: Knit
- Row 14: Purl
- Row 15: K2tog, K2, K2tog (4 sts)
- Row 16: P2tog, P2tog (2 sts)
- Row 17: Slip 1, psso (1 st remaining)
Break yarn and draw it through the remaining stitch to secure. Make a second identical ear.
Assembly and Finishing
Bringing all the pieces together for your charming fox cowl!
Securing the Hood Front
Fold the seed stitch front edge of the hood back onto itself. Using your tapestry needle and a piece of the main color yarn, tack this folded edge at the very top of the hood. This will help it stay securely in place.
Next, place the two 1-inch buttons at the bottom corners of the hood to secure the small front edge down. You can stitch these firmly in place.
Assembling the Ears
For each ear you’ve knitted:
- Fold the ear in half lengthwise along the specified row:
- Teen/Adult: Along Row 12
- Child/Toddler: Along Row 10
- 12/18 Months: Along Row 9
- With your crochet hook, work a single crochet stitch along the two open sides of the folded ear. This will securely join the ear halves.
- Break yarn and weave in all remaining ends.
Attaching the Ears to the Cowl
Use your tapestry needle and a piece of your main color yarn to securely sew the finished fox ears onto the hood. You can place them anywhere you prefer, but here are some suggested placements:
- Adult Size: Place ears approximately 2.5 inches from the front edge of the hood and 5 inches apart.
- Child/Toddler/12-18 Months Sizes: Place ears approximately 2.5 inches from the front edge of the hood. For Child/Toddler, place them 4.5 inches apart. For 12/18 months, place them 4 inches apart.
Tips for Beginners
If you’re new to knitting or crochet, don’t be intimidated! This project uses fundamental techniques that are great for building skills.
- Practice Stitches: Before starting, practice basic knit (K), purl (P), single crochet (sc), and increase/decrease stitches (Kfb, K2tog, P2tog) until you feel comfortable.
- Stitch Markers are Your Friend: Always use a stitch marker to denote the beginning of your rounds when working circularly. It saves a lot of counting and potential frustration.
- Reading Your Knitting: For the seed stitch, the key is to “knit the purls and purl the knits.” This means looking at the previous row’s stitches: if a stitch looks like a ‘V’ (knit stitch), you purl it. If it looks like a horizontal bump (purl stitch), you knit it.
- Mattress Stitch: This technique for seaming knit fabric creates an almost invisible join. Many excellent video tutorials are available online if you need visual guidance.
- Check Your Gauge: While optional for some projects, checking your gauge for this cowl ensures your finished item matches the intended dimensions, especially important for the fitted hood.
- Yarn Choice: Using super bulky yarn makes this a relatively quick project, which can be very rewarding for beginners.
Enjoy creating your adorable Failynn Fox Cowl