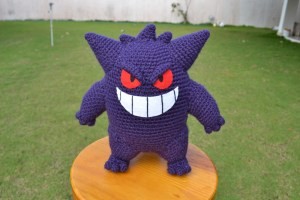
Crochet Gengar Pattern – Perfect for Pokémon Lovers
What You’ll Need
Before we dive into the stitches, here’s everything you’ll need to crochet your very own Gengar:
- Yarn: Dark purple yarn (for the main body and parts)
- Felt: Red and white felt (for facial details)
- Stuffing: Fiberfill (to make Gengar nice and cuddly)
- Fabric Paint: Black fabric paint (for pupils and mouth details)
- Brush: Small paintbrush (for applying the paint)
- Crochet Hooks: 4 mm hook (main parts), 2.5 mm hook (for small details like eyebrows and toes)
- Tapestry Needle: For sewing all the pieces together
- Craft Glue: Fabric-safe contact glue (to secure felt pieces)
Crochet Abbreviations (US Terms)
Let’s make sure we’re speaking the same stitch language! Here are the abbreviations used in this pattern:
- MR = Magic Ring
- sc = single crochet
- inc = increase (2 sc in one stitch)
- dec = decrease (sc two stitches together)
- hdc = half double crochet
- sl = slip stitch
- ( ) = number of stitches at the end of the round
💡 Tip: This pattern uses continuous rounds (no joining at the end of rounds unless specified). Use a stitch marker to keep track of the beginning of each round
Finished Size & Gauge
While the original pattern doesn’t specify exact measurements, this Gengar typically turns out to be around 6–8 inches tall when made with standard worsted weight yarn and a 4mm hook—perfect for a palm-sized pal or plushie companion
Step-by-Step Crochet Instructions
Let’s start bringing Gengar to life, piece by piece! We’ll work on the body first, then move on to the horns, spikes, limbs, and more. Take your time—each part is small and satisfying to complet
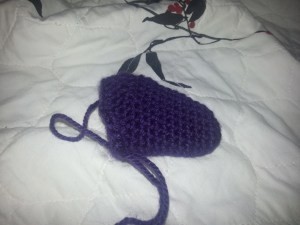
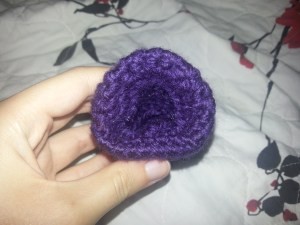
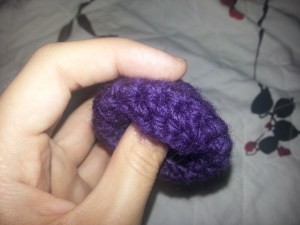
Body
Let’s begin with Gengar’s main body
- Round 1: 6 sc in magic ring (6)
- Round 2: 2 sc in each sc (12)
- Round 3: sc, inc around (18)
- Round 4: 2 sc, inc around (24)
- Round 5: 3 sc, inc around (30)
- Round 6: 4 sc, inc around (36)
- Round 7: 5 sc, inc around (42)
- Round 8: sc in each sc (42)
- Round 9: 6 sc, inc around (48)
- Rounds 10–11: sc in each sc (48)
- Round 12: 7 sc, inc around (54)
- Rounds 13–14: sc in each sc (54)
- Round 15: 8 sc, inc around (60)
- Rounds 16–19: sc in each sc (60)
- Round 20: 9 sc, inc around (66)
- Rounds 21–25: sc in each sc (66)
- Round 26: 9 sc, dec around (60)
- Rounds 27–30: sc in each sc (60)
- Round 31: 8 sc, dec around (54)
- Rounds 32–33: sc in each sc (54)
- Round 34: 7 sc, dec around (48)
- Rounds 35–36: sc in each sc (48)
- Round 37: 6 sc, dec around (42)
- Round 38: sc in each sc (42)
- Round 39: 5 sc, dec around (36)
- Round 40: 4 sc, dec around (30)
- Round 41: 3 sc, dec around (24)
- Round 42: 2 sc, dec around (18)
- Round 43: sc, dec around (12)
- Round 44: dec around (6)
- Finish off and close tightly.
👉 Don’t stuff yet! We’ll do that during assembly
Big Horns (Make 2)
These sit on top of Gengar’s head
- Round 1: 4 sc in magic ring (4)
- Round 2: sc in each sc (4)
- Round 3: inc around (8)
- Round 4: sc in each sc (8)
- Round 5: sc, inc around (12)
- Round 6: sc in each sc (12)
- Round 7: 2 sc, inc around (16)
- Round 8: sc in each sc (16)
- Round 9: 3 sc, inc around (20)
- Round 10: sc in each sc (20)
- Round 11: 4 sc, inc around (24)
- Round 12: sc in each sc (24)
- Round 13: 5 sc, inc around (28)
- Round 14: sc in each sc (28)
- Finish off and leave a long tail for sewing
Eyebrows (Make 2, use 2.5mm hook)
These add so much character
- Round 1: 3 sc in magic ring (3)
- Round 2: sc, inc, sc (4)
- Round 3: sc, inc, sc, sc (5)
- Round 4: sc, sc, inc, sc, sc (6)
- Round 5: sc, sc, dec, sc, sc (5)
- Round 6: sc, dec, sc, sc (4)
- Round 7: sc, dec, sc (3)
- Finish off and leave a long tail
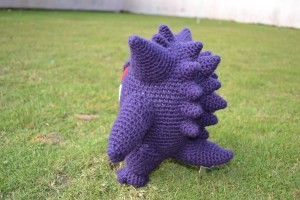
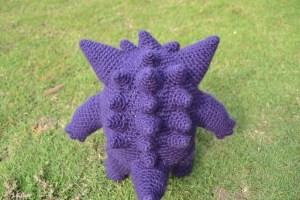
Side Back Spikes (Make 8)
These go along the sides of Gengar’s back.
- Round 1: 4 sc in magic ring (4)
- Round 2: sc in each sc (4)
- Round 3: inc around (8)
- Round 4: sc in each sc (8)
- Round 5: sc, inc around (12)
- Finish off and leave a long tail.
Middle Back Spikes (6 total)
We’ll make these a little taller in the center.
- Crochet 3 spikes just like the side back spikes above.
- Crochet 2 spikes using this longer version:
- Rounds 1–5: Same as side spikes
- Rounds 6–7: sc in each sc (12)
- Finish off and leave a long tail.
- Crochet 1 spike using this short version:
- Round 1: 4 sc in MR (4)
- Round 2: sc in each sc (4)
- Round 3: inc around (8)
- Round 4: sc in each sc (8)
- Finish off and leave a long tail.
Head Spikes (Make 3 Different Sizes)
Let’s give Gengar some personality on top
Large Middle Spike (1):
- Rounds 1–4: Same as before (4 → 4 → 8 → 8)
- Round 5: inc in next 4, sc in next 4 (12)
- Round 6: sc in each sc (12)
- Row 7: sc 6
- Row 8: sc 6
- Finish off and leave a long tail
Medium Middle Spike (1):
- Rounds 1–4: Same (4 → 4 → 8 → 8)
- Row 5: sc 4
- Finish off and leave a long tail.
Small Middle Spike (1):
- Rounds 1–2: 4 sc in MR, then sc in each (4 → 4)
- Round 3: inc around (8)
- Row 4: sc 4
- Row 5: sc 4
- Finish off and leave a long tail
Arms (Make 2)
- Round 1: 6 sc in MR (6)
- Round 2: 2 sc in each sc (12)
- Round 3: inc in next 4, sc in next 8 (16)
- Rounds 4–5: sc in each sc (16)
- Round 6: sc 2, inc in next 4, sc 10 (20)
- Rounds 7–11: sc in each sc (20)
- Round 12: sc 5, inc in next 4, sc 11 (24)
- Round 13: sc in each sc (24)
- Round 14: sc, inc, sc 3, inc, dec 4, sc 3, inc, sc 3, inc, sc 2 (24)
- Rounds 15–17: sl 2, sc 3, hdc 10, sc 3, sl 6 (24)
- Finish off.
👉 Before sewing on, fold the last few rows to give the arms a bent, playful look—see assembly tips below
Fingers (Make 4)
Tiny but mighty!
- Round 1: 4 sc in MR (4)
- Round 2: inc around (8)
- Finish off and leave a long tail
Legs (Make 2)
- Round 1: 6 sc in MR (6)
- Round 2: 2 sc in each sc (12)
- Round 3: sc, inc around (18)
- Round 4: sc in each sc (18)
- Round 5: sc 4, inc, sc 3, inc, sc 4, inc, sc 3, inc (22)
- Round 6: sc 10, inc (24)
- Round 7: sc 7, inc (27)
- Round 8: sc in each sc (27)
- Row 9: sc 3, inc, sc, inc, sc, inc, sc, inc, sc, inc, sc 3 (20)
- Row 10: sc 6, inc, sc, inc, sc, inc, sc, inc, sc, inc, sc 5 (25)
- Row 11: sc in each sc (25)
- Finish off and leave a long tail
Feet (Make 2)
- Round 1: 6 sc in MR (6)
- Round 2: inc around (12)
- Round 3: sc 3, inc (15)
- Rounds 4–6: sc in each sc (15)
- Round 9: sc 3, dec (12)
- Round 10: dec around (6)
- Finish off
Toes (Make 4, use 2.5mm hook)
Super tiny and cute
- Round 1: 4 sc in MR (4)
- Round 2: inc around (8)
- Finish off and leave a long tail.
Tail
- Round 1: 4 sc in MR (4)
- Round 2: sc in each sc (4)
- Round 3: inc around (8)
- Round 4: sc in each sc (8)
- Round 5: inc 4, sc 4 (12)
- Round 6: sc in each sc (12)
- Round 7: sc, inc 6, sc 5 (18)
- Rounds 8–10: sc in each sc (18)
- Round 11: sc 6, inc in next 6, sc 6 (24)
- Round 12: sc in each sc (24)
- Round 13: hdc 5, sl 15, hdc 4 (24)
- Round 14: hdc 6, sl 15, hdc 3 (24)
- Round 15: hdc 7, sl 15, hdc 2 (24)
- Round 16: hdc 8, sl 15, hdc 1 (24)
- Row 17: hdc 9
- Row 18: hdc 9
- Finish off and leave a long tail
Assembly: Bringing Gengar to Life
Now for the fun part—putting all the pieces together
- Sew the Big Horns onto the top sides of the head.
- Attach the Head Spikes in the center of the head, layering the three sizes for a cool, jagged look.
- Sew the Arms to the Body:
- Before attaching, fold the last few rows of the arm to create a bent elbow.
- Fold the top 2 rows inward, the side 3 rows inward, and the bottom 4 rows inward to make the arm look angled.
- Then sew securely in place.
- Sew Fingers to the front of each arm.
- Sew Feet to Legs, then attach Toes to the front of each foot.
- Sew Legs and Tail to the bottom and back of the body. Slightly fold the leg tips for a neat finish.
- Arrange the Back Spikes along Gengar’s back—3 taller ones in the center, 3 shorter ones, and 8 side spikes around the edges. Sew them in place
Face Time: Adding Personality
This is where Gengar really comes alive
- Plan the Face: Cut out paper templates of the eyes and mouth to test placement on the face. Adjust until you’re happy with the look
- Cut Felt Shapes: Use white felt for the eyes and red felt for the mouth
- Paint the Pupils: Use black fabric paint to add pupils to the white eyes. Let dry completely
- Position the Eyebrows: Use tape to temporarily place the eyebrows where you want them
- Sew the Eyebrows in place with matching thread
- Glue the Eyes and Mouth: Once everything is positioned just right, use fabric glue to securely attach the felt pieces
Pro Tip: Let the glue dry completely before handling your Gengar too much