Crochet a Classic Childhood Friend: Cheburashka Amigurumi Pattern
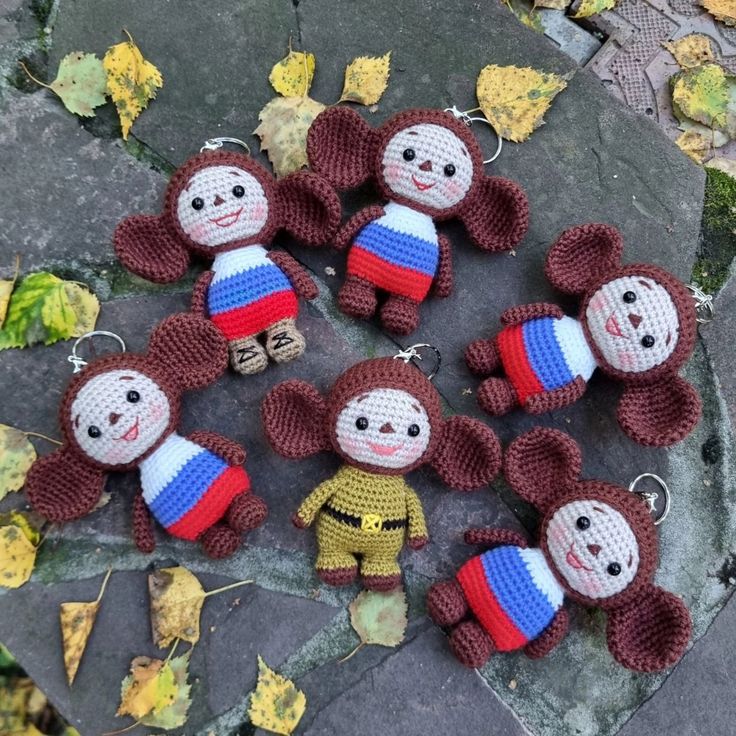
Hello, dear crocheter! Do you remember a charming, fuzzy friend with enormous ears and a heart of gold? Today, we’re bringing a touch of nostalgic magic to your hook with a pattern for the one and only Cheburashka! This beloved character, known and adored by generations, is now ready to be crafted with love in your own home.
This pattern is a wonderful project for crocheters who are comfortable with amigurumi construction, color changes, and sewing parts together. We’ll build Cheburashka from his little feet up, crafting his signature oversized ears, sweet face, and cuddly body. Seeing this classic friend take shape under your fingers is a truly special experience. He makes an absolutely perfect gift for anyone who holds childhood stories dear or simply loves uniquely charming plushies.
This masterclass pattern is the work of designer Elena Kuznetsova (Frank). As with all handmade patterns, it’s shared for your personal crafting joy. Please respect the designer’s work by not redistributing or selling the pattern itself. The finished Cheburashka you create, however, is yours to love and gift!
So, gather your soft brown and beige yarns, prepare your hook, and let’s embark on a cozy, creative journey to stitch a timeless friend who is sure to bring smiles for years to come.
Materials & Tools
- Yarn:
- Main Color (MC): Medium weight (Worsted/Aran) yarn in Brown for the body and ears.
- Contrast Color (CC): Medium weight yarn in Beige/Tan for the muzzle/face.
- Small amounts of Black embroidery thread for details.
- Crochet Hook: Size recommended for your yarn (e.g., 3.5mm – 4.0mm).
- Filling: Polyester fiberfill.
- Eyes: Two small black safety eyes (approx. 8-10mm) or black felt circles to glue.
- Notions: Tapestry needle, scissors, stitch markers, pins for assembly.
- Optional: Fabric glue for securing eyes.
Crochet Abbreviations & Notes
This pattern uses common Cyrillic crochet abbreviations. Here is your translation guide to US terms:
- В ка / Magic Ring: Start with a magic circle.
- сбн (sc): Single Crochet
- пр (inc): Increase (2 sc in one stitch)
- уб (dec): Decrease (sc 2 stitches together)
- вп (ch): Chain
- ★: Repeat instruction the number of times indicated.
- ( ): Total stitch count at the end of the round.
- Important Construction Note: The body starts with two separate legs, which are then joined by a chain bridge to form the lower body. Pay close attention to Round 7 & 8.
Step-by-Step Crochet Instructions
Part 1: The Body & Head (Worked from Feet Up to Crown)
We begin with the two feet/legs and build upwards, changing to beige for the muzzle.
Legs (Make 2, starting with Brown):
- 6 sc in MR (6).
- 6 inc (12).
- (1 sc, inc) x6 (18).
- Rounds 4-5: 18 sc.
- 3 sc, (dec) x6, 3 sc (12).
- (1 sc, dec) x4 (8).
- On the FIRST leg only: Fasten off, leave tail.
- On the SECOND leg: Do NOT fasten off. You will continue from here to join the legs.
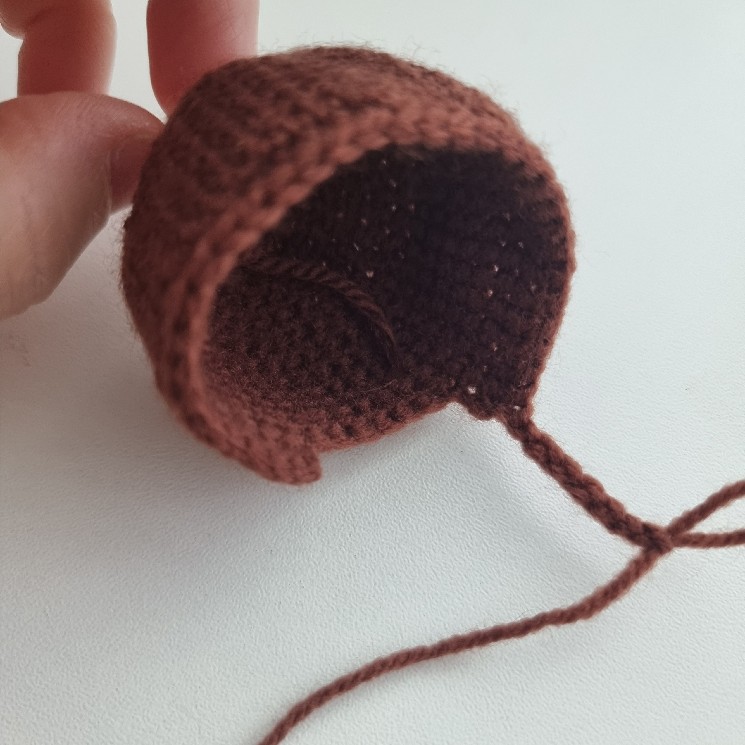
Joining the Legs & Forming Lower Body:
7. With the second leg still active, work 2 sc across that leg.
* Now, create a bridge: Ch 2.
* To join to the first leg: Count 2 stitches to the right from the last stitch on the first leg. Attach your chain here and work 2 sc across the chain.
8. You are now working in a continuous round around both legs and the chain.
* Round 8: Work around the entire oval: (2 sc, inc) x2, 2 sc, 2 sc across chain, 2 sc, (inc, 2 sc) x2, 2 sc across chain (24 total).
* Place a stitch marker at the center back.
Continuing the Body (Brown):
9. (3 sc, inc) x6 (30).
10. (4 sc, inc) x3, (inc, 4 sc) x3 (36).
11. Rounds 11-18: 36 sc (8 rounds).
12. (4 sc, dec) x3, (dec, 4 sc) x3 (30).
13. (3 sc, dec) x6 (24).
14. (2 sc, dec) x6 (18).
15. (4 sc, dec) x3 (15).
16. 15 sc.
* Change to Beige yarn.
Forming the Muzzle & Head (Beige):
17. 15 inc (30).
18. (4 sc, inc) x6 (36).
19. (5 sc, inc) x6 (42).
20. Rounds 20-27: 42 sc (8 rounds).
21. (5 sc, dec) x6 (36).
22. (4 sc, dec) x6 (30).
23. (3 sc, dec) x6 (24).
24. (2 sc, dec) x6 (18).
25. (1 sc, dec) x6 (12).
26. 6 dec (6). Fasten off and close the hole. Weave in the end.

Part 2: The Head Cover / Muzzle Shape (Beige)
This piece fits over the top/front of the head to define the muzzle.
- 6 sc in MR (6).
- 6 inc (12).
- (1 sc, inc) x6 (18). (Note: Pattern says ★18, assumed to be ★6 for 18 total stitches)
- (2 sc, inc) x6 (24).
- (3 sc, inc) x6 (30).
- (4 sc, inc) x6 (36).
- (5 sc, inc) x6 (42).
- Rounds 8-12: 42 sc (5 rounds).
- Now work in turned rows to create the neck opening:
- Row 13-14: 36 sc, ch 1, turn. Do not fasten off.
- “Put on the hat”: Position this piece over the front of the beige muzzle on the head. The opening created by the short rows should fit under the chin.
- To shape the chin: Ch 7 to create a strap under the chin. Attach this chain to the other side of the opening to form a circle.
- Work sc evenly around the entire muzzle piece and the chin chain: (5 sc, dec) x6 to tighten the fit.
- 36 sc around. If the fabric “pokes out” on the forehead, you can make a couple of decreases here.
Part 3: The Chest Patch (Beige)
Work in turned rows.
- Ch 5. In the 2nd ch from hook: 3 sc. In the last chain, work 4 sc. Working back down the other side of the chain: 3 sc. Ch 1, turn.
- 3 sc, (inc) x4, 3 sc. Ch 1, turn.
- 5 sc, inc, 2 sc, inc, 5 sc. Fasten off.
Part 4: The Arms (Make 2, Brown)
- 8 sc in MR (8).
- Rounds 2-5: 8 sc (4 rounds).
- 6 sc, dec (7).
- Rounds 7-10: 7 sc (4 rounds).
- To close/flatten: Work 3 sc through both sides of the opening. Fasten off.
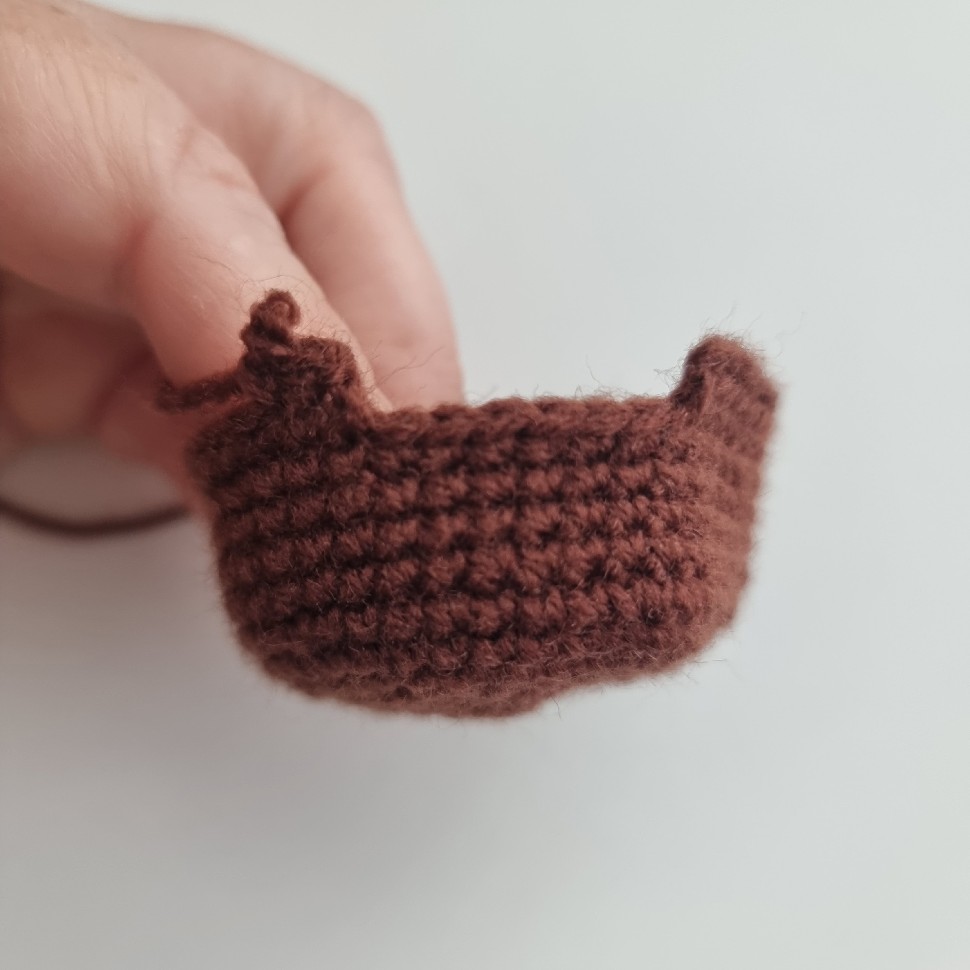
Part 5: The Ears (Make 2, Brown)
- 6 sc in MR (6).
- 6 inc (12).
- (1 sc, inc) x6 (18).
- (2 sc, inc) x6 (24).
- Rounds 5-7: 24 sc (3 rounds).
- (2 sc, dec) x6 (18).
- (1 sc, dec) x6 (12).
- To close/flatten: Work 6 sc through both sides of the opening. Fasten off, leaving a long tail for sewing.
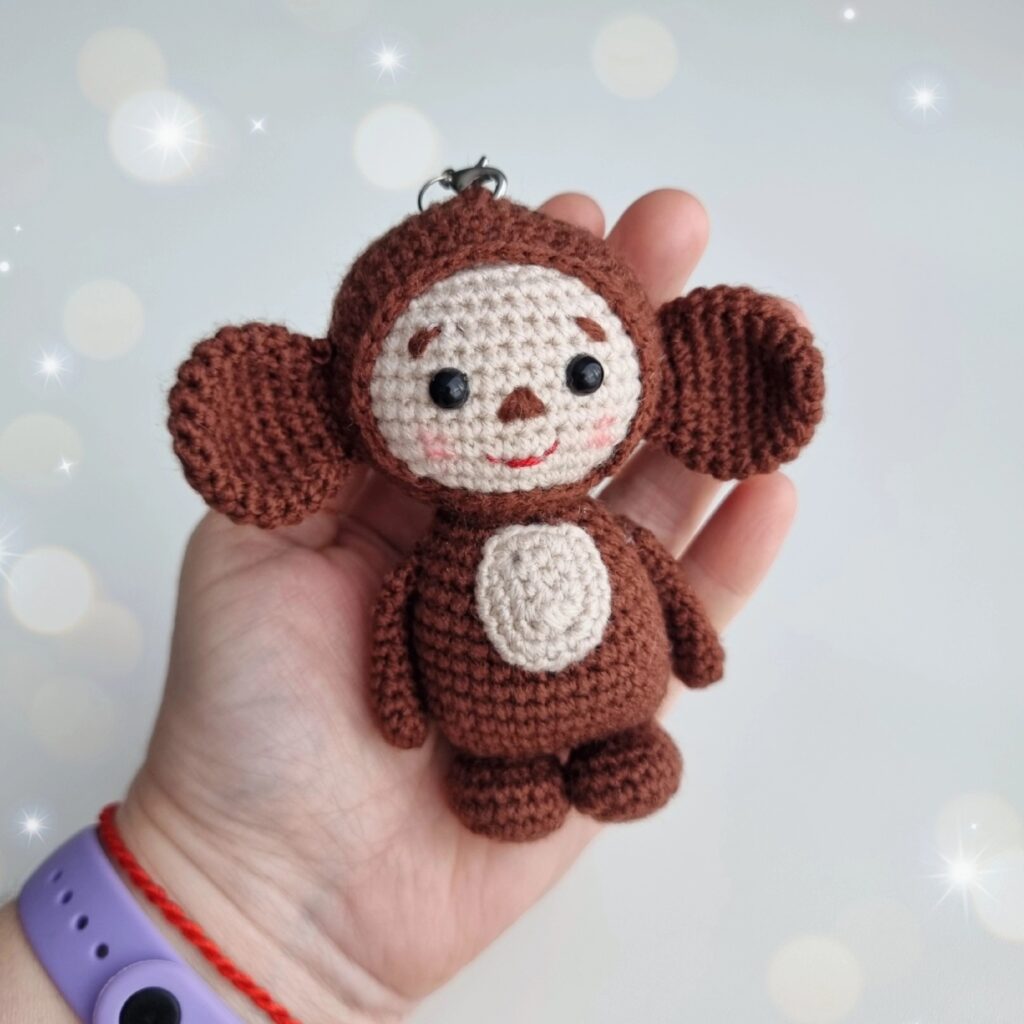
Assembly & Finishing: Creating Cheburashka’s Face
- Sew the Head Cover: Carefully sew the beige muzzle/head cover piece onto the front of the head, aligning it with the beige section of the main body.
- Attach the Chest: Sew the small beige chest patch to the front of the body.
- Attach the Arms: Sew the arms to the upper sides of the body.
- Attach the Ears: Sew the large ears to the top sides of the head. They should be prominent and floppy.
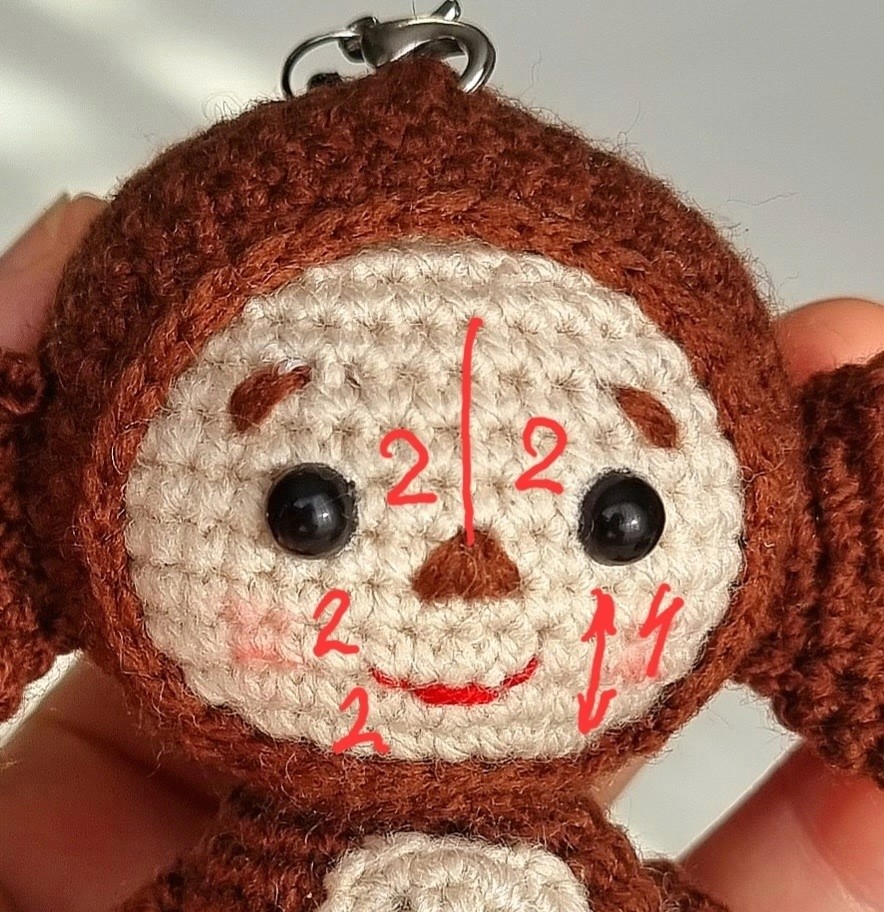
- Facial Features (Crucial!): The designer provides a guide:
- Nose: Count 4 rounds up from the bottom of the beige muzzle. On the 5th round, embroider a black triangular nose. The base of the triangle should be about 2 stitches wide.
- Mouth: The mouth is 2 rounds down from the nose and 2 rows up from the bottom edge of the muzzle. Embroider a simple horizontal line or a gentle curve.
- Eyes: Attach the safety eyes or glue felt circles. The bottom of the eyes should be level with the top point of the nose triangle, or slightly overlapping it. Position them about 2 stitches away from the sides of the nose’s top point.
Tips for a Perfect Cheburashka
- Joining the Legs: Take your time with Rounds 7 & 8. Using stitch markers on both legs before joining can help you identify the correct attachment points.
- Stuffing: Stuff the body and head very firmly so he can sit upright. The ears only need light stuffing around the base to help them hold shape; the outer edges can be left floppy.
- Muzzle Placement: Pin the head cover in place before sewing to ensure it’s centered and symmetrical.
- Ear Magic: The ears are a signature feature. Give them a slight fold or curve as you sew them on for more character.
- Face Symmetry: Lightly mark the placement for the nose and eyes with pins or a washable marker before committing with thread or glue.
Congratulations! Your very own handmade Cheburashka is complete