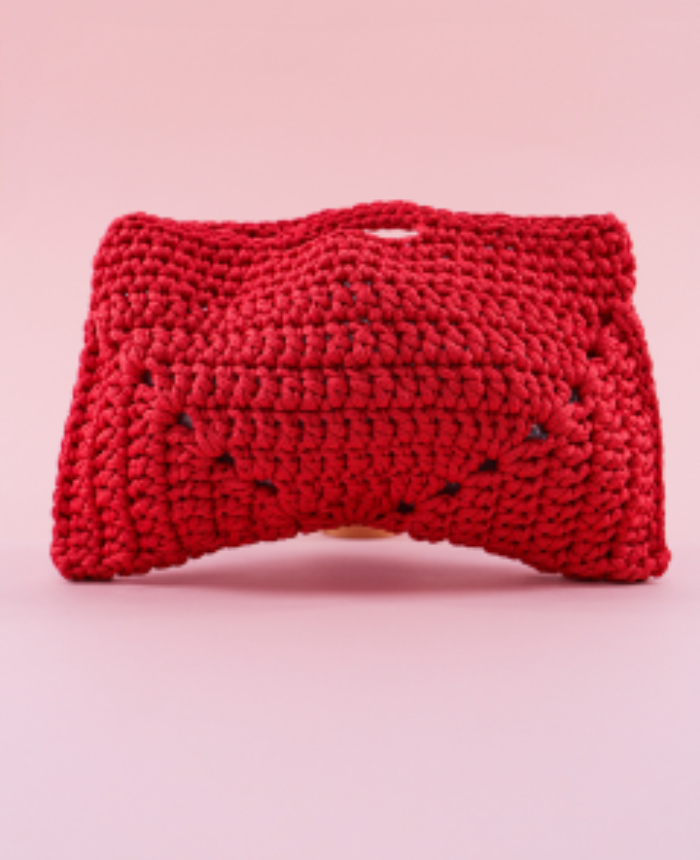
Bobble and Fringe Crochet Pillow: Free Pattern
Hello, cozy makers!
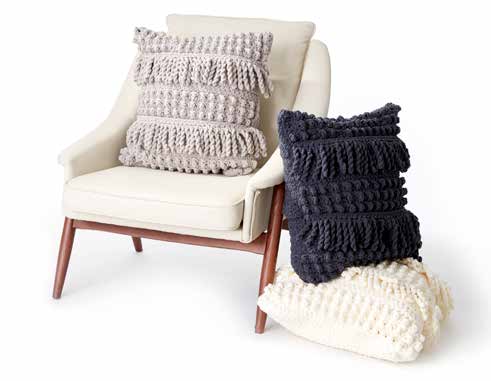
There’s nothing quite like adding a handmade touch to your home decor, and this Bobble and Fringe Crochet Pillow is the perfect project to bring both texture and warmth to your living space. Using super-soft Bernat Blanket yarn, this pillow works up quickly and offers a satisfying mix of simple stitches and eye-catching bobbles.
Whether you’re curling up on the couch with a good book or styling your bed for the season, this pillow is as functional as it is beautiful. The playful fringe adds a boho touch, while the reversible bobble texture ensures it looks great from every angle.
This pattern is perfect for confident beginners who are comfortable with basic stitches and ready to try something new. I’ll guide you through each step, from the bobble-stitch front to the easy overlap back.
Let’s grab our hooks and make some cozy magic
Materials You’ll Need
- Yarn: Bernat® Blanket™ (10.5 oz/300 g, 220 yds/201 m)
- 2 balls in Vintage White, Pale Gray, or Coal
- *Total: 440 yds/402 m*
- Crochet Hook: U.S. L/11 (8 mm) or size needed to match gauge
- Other Supplies:
- 20-inch (51 cm) square pillow form
- Stitch marker
- Tapestry needle
- Scissors
Skill Level
Intermediate Beginner
Finished Size
Approximately 20 inches (51 cm) square
Gauge
7 sc and 8 rows = 4 inches (10 cm)
Always check your gauge before starting
Crochet Abbreviations
- ch = chain
- sc = single crochet
- sl st = slip stitch
- tr = treble crochet
- RS = right side
- WS = wrong side
- rep = repeat
- st(s) = stitch(es)
Pattern Instructions
Pillow Front
Note: Treble stitches are worked on the wrong side to create bobbles that pop out on the right side.
- Ch 36.
- Row 1 (RS): Sc in 2nd ch from hook, sc in each ch across. Turn. (35 sc)
- Row 2: Ch 1, tr in next st, sc in next st, rep from * to end. Turn.
- Row 3: Ch 1, sc in each st across. Turn.
- Rows 4–5: Rep Rows 2 and 3.
- Row 6: Rep Row 2.
- Rows 7–17: Ch 1, sc in each st across. Turn.
- Rep Rows 2–17 once more.
- Rep Rows 2–7 once more. Fasten off
Fringe Strips (Make 2)
- Ch 36.
- Row 1: Sc in 2nd ch from hook, sc in each ch across. Turn. (35 sc)
- Row 2: Ch 1, sl st in next sc, draw up a loop about 10 inches long, twist loop 25 times, sl st in same st to secure twisted fringe, rep from * to end. Fasten off
Pillow Back (Make 2 Alike)
Ribbed Section:
- Ch 5.
- Row 1: Sc in 2nd ch from hook, sc in each ch across. Turn. (4 sc)
- Row 2: Ch 1, working in back loops only, sc in each st across. Turn.
- Rep Row 2 until ribbing measures about 20 inches when slightly stretched. Do not fasten off.
Main Back Panel:
- Turn work sideways.
- Row 1: Ch 1, work 35 sc evenly along the side of the ribbing. Turn. Place marker at end of row.
- Row 2: Ch 1, sc in each st across. Turn.
- Rep Row 2 until piece measures 11 inches from marker. Fasten off
Finishing
- Sew the fringe strips to the pillow front, just below the first and second bobble sections, as shown in the photo.
- Lay the two back pieces over the pillow front, overlapping the ribbed sections in the center to create an opening for the pillow form.
- Sew around all four outer edges to join the front and back.
- Insert the pillow form through the back opening
Tips for Success
- Use a stitch marker to track the right side of your work.
- When making fringe, twist the loops tightly so they coil nicely.
- Don’t overstuff the pillow—it should be plump but still soft.
- Weave in ends securely since this pillow will get plenty of use
Your Cozy Creation Is Complete!
Congratulations! You’ve just made a beautiful, huggable pillow that’s sure to become a favorite in your home. 🛋️💖