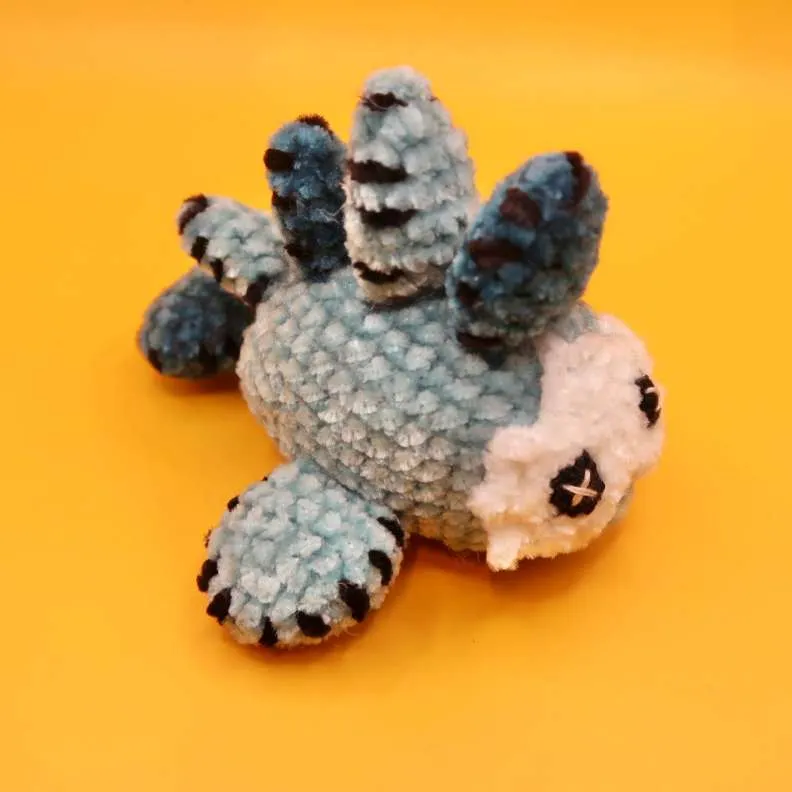
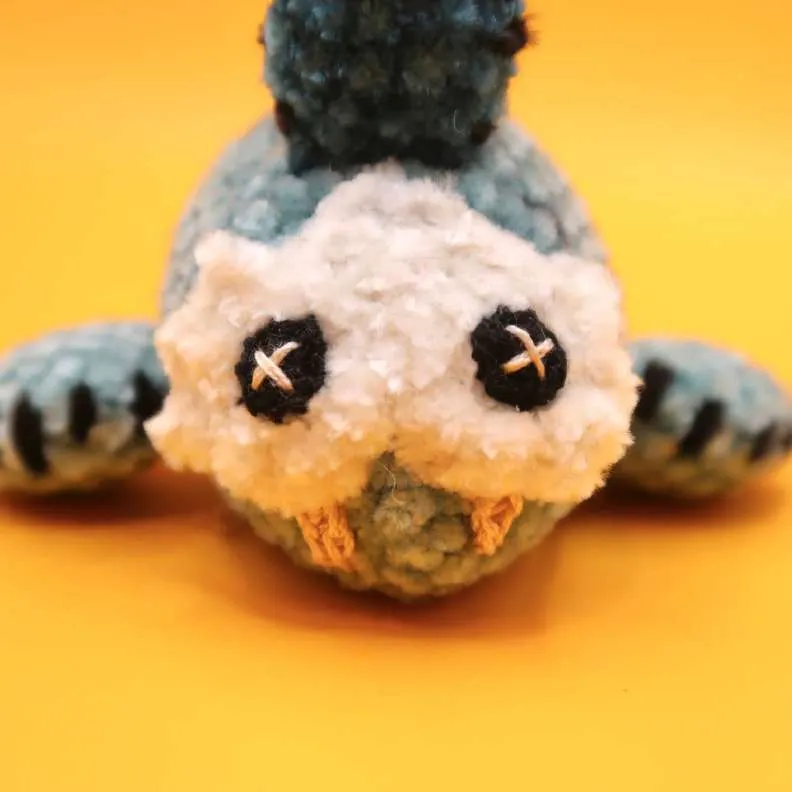
Crochet Your Own Legend of Zelda Sand Seal Plushie
Do you hear that? It’s the sound of tiny flippers pattering across the Gerudo Desert! This adorable Sand Seal plushie, inspired by The Legend of Zelda: Breath of the Wild, is ready to join your crochet adventures. Designed by Susanna Berra of Dragon’s Yarn, this free pattern is perfect for crafters of all skill levels who want to create something magical.
Whether you’re making it for yourself, a fellow Zelda fan, or as part of a crochet-themed gift, this little seal is:
- Quick to make (just a few hours!)
- Perfectly pocket-sized (3.4 inches of pure cuteness)
- Great for beginners (simple stitches and clear instructions)
- Customizable (choose your favorite in-game seal colors!)
So grab your hook, pick some soft velvet yarn, and let’s make a Sand Seal companion worthy of Princess Zelda herself!
Materials You’ll Need
Yarn Choices:
- Velvet yarn (for that perfect plushie texture):
- Main body color (light blue, red, or green)
- Contrast color for fins/tail (dark blue, red, or green)
- White/beige for the face mask
- Black for embroidery details
- Regular yarn (one size smaller than your velvet yarn):
- Black or dark color for eyes
- White/beige for fangs and eye highlights
Other Supplies:
- 3mm crochet hook (for velvet yarn)
- 2mm crochet hook (for finer details)
- Polyfill stuffing (or yarn scraps)
- Stitch marker (to keep track of rounds)
- Tapestry needle (for sewing parts together)
- Scissors
- Optional: Small buttons for eyes (if not crocheting them)
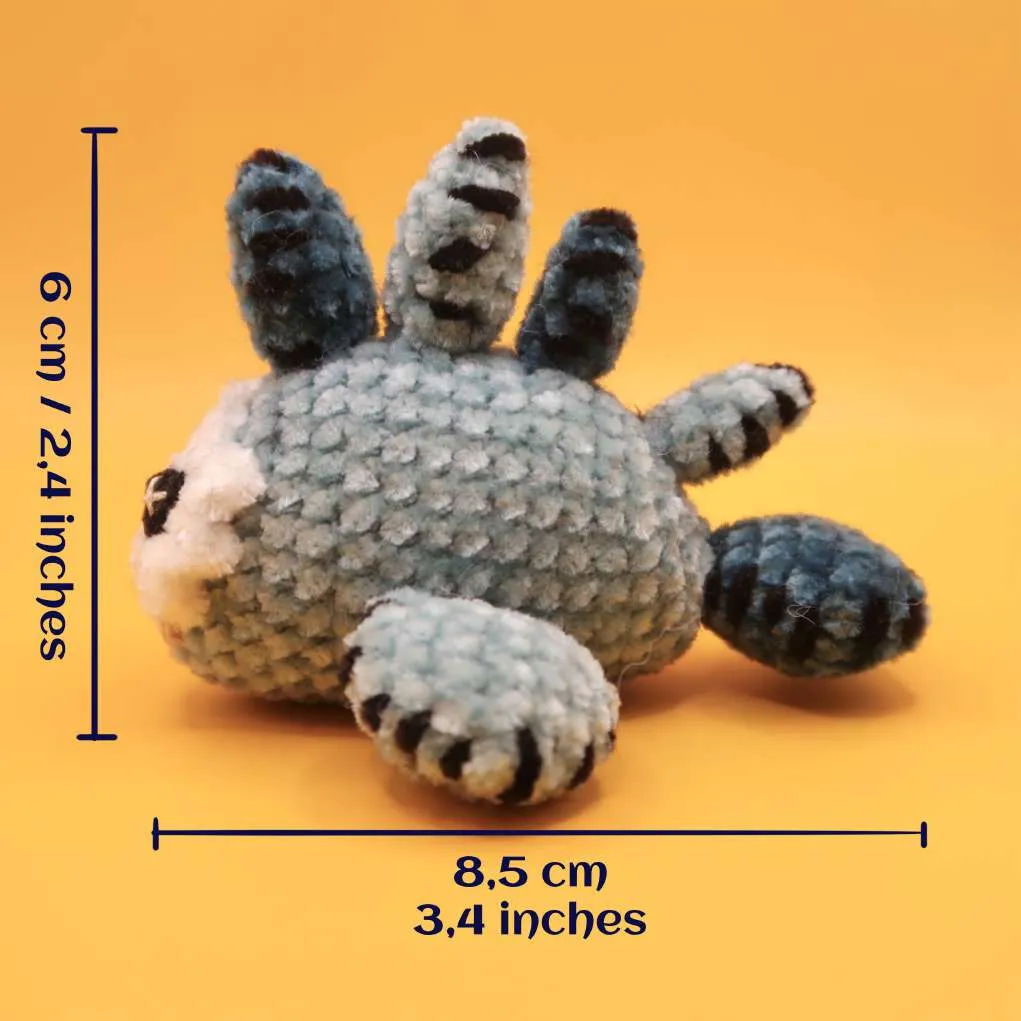
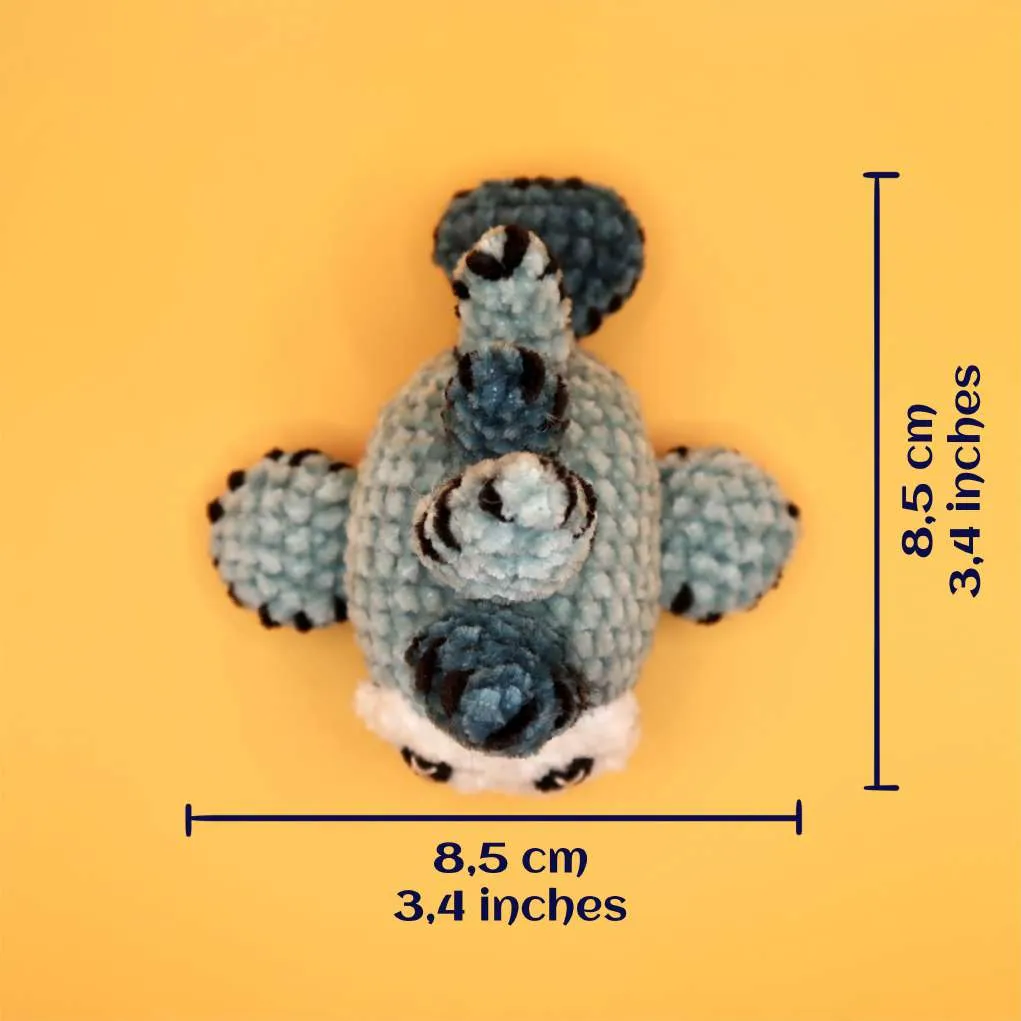
Finished Size: About 3.4 inches long and wide, and 2.4 inches tall – perfectly pocket-sized!
Crochet Abbreviations (US Terms)
- st(s): stitch(es)
- ch: chain
- sc: single crochet
- sl st: slip stitch
- hdc: half double crochet
- dc: double crochet
- inc: increase (2 sc in same stitch)
- dec: decrease (sc two together)
- MR: magic ring
- FLO: work in front loop only
- FO: fasten off
Step-by-Step Pattern Instructions
1. The Body (Worked in Continuous Rounds)
Yarn: Start with light blue (or your main color).
- Round 1: Make a magic ring and work 6 sc into it. (6 sts)
- Round 2: Increase in every stitch around. (12 sts)
- Round 3: 3 sc, 6 inc, 3 sc. (18 sts)
- Round 4: 6 sc, 6 inc, 6 sc. (24 sts)
- Round 5: 9 sc, 6 inc, 9 sc. (30 sts)
- Rounds 6-13: Sc in each stitch around. (30 sts)
- Round 14: 13 sc, (1 sc, 1 dec, 1 sc) 3 times, 5 sc. (27 sts)
- Round 15: Sc in each stitch around. (27 sts)
- Round 16: 14 sc, (1 sc, 1 dec) 3 times, 4 sc. (24 sts)
- Round 17: 10 sc, 6 dec, 2 sc. (18 sts)
- Round 18: 1 dec, 6 sc, 5 dec. (12 sts)
Now, stuff the body firmly but not too tight!
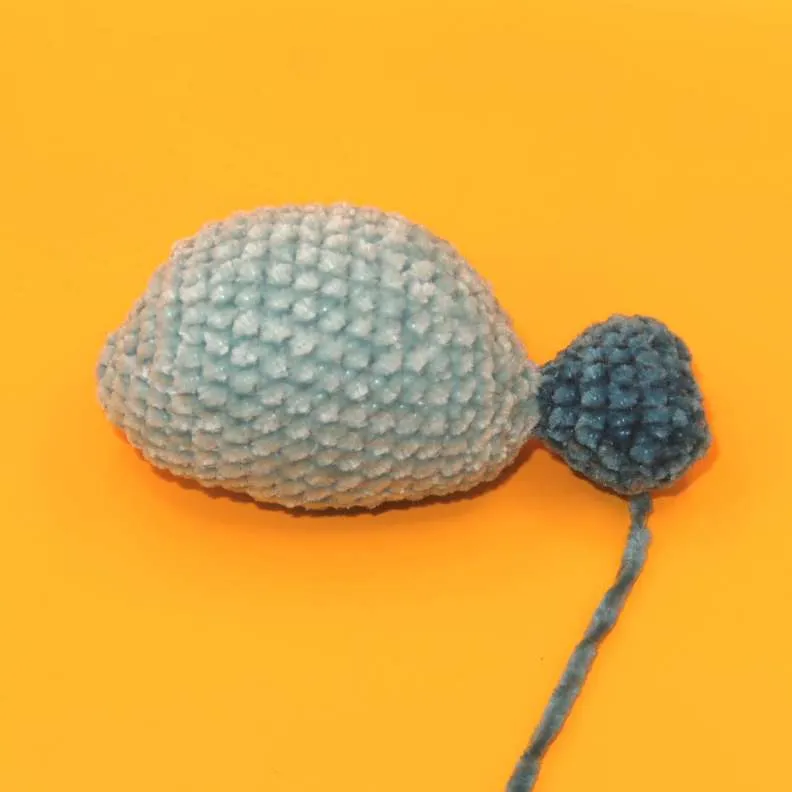
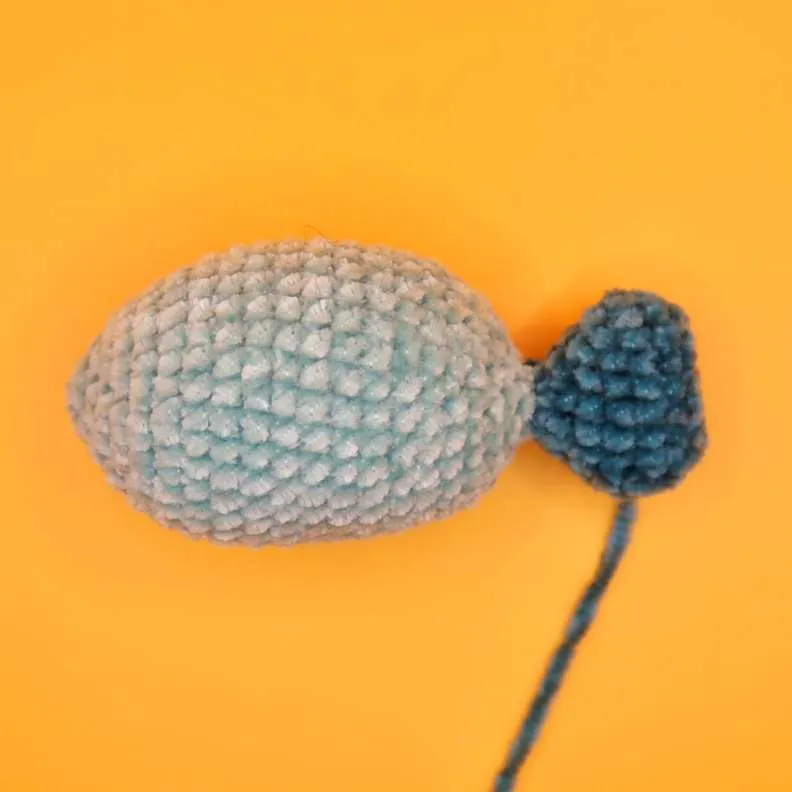
- Round 19: Decrease around until closed. (6 sts)
- Switch to dark yarn for the tail.
- Round 20: Working in front loops only, (2 sc, 1 inc) twice. (8 sts)
- Round 21: (2 sc, 2 inc) twice. (12 sts)
- Round 22: (3 sc, 1 inc, 1 sc, 1 inc) twice. (16 sts)
- Round 23: (5 sc, 1 inc, 1 sc, 1 inc) twice. (20 sts)
- Round 24: 7 sc, 1 inc, 1 sc, 1 inc. (24 sts)
- Round 25: (4 sc, 4 dec) twice. (16 sts)
- Round 26: (4 sc, 2 dec) twice. (12 sts)
Fasten off, leaving a tail to sew the tail closed. Stuff lightly and shape.
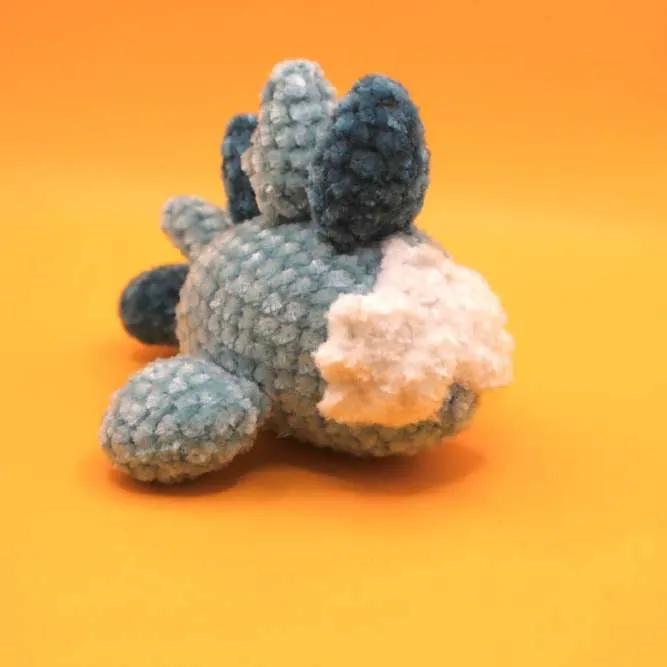
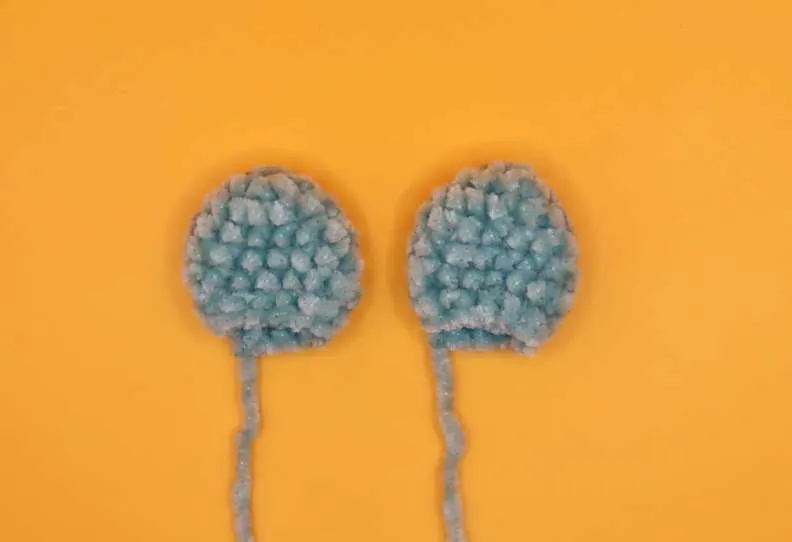
2. The Fins (Make 4 Total)
You’ll need:
- 2 big fins (1 light, 1 dark)
- 2 small fins (1 light, 1 dark)
Big Fins:
- Round 1: 4 sc in MR. (4 sts)
- Round 2: (1 inc, 1 sc) twice. (6 sts)
- Round 3: (2 inc, 1 sc) twice. (10 sts)
- Round 4: (2 sc, 1 inc, 2 sc) twice. (12 sts)
- Rounds 5-6: Sc around. (12 sts)
- Round 7: (2 sc, 1 dec, 2 sc) twice. (10 sts)
- Sl st, fasten off, leaving a tail to sew onto the body.
Small Fins:
- Round 1: 4 sc in MR. (4 sts)
- Round 2: (1 inc, 1 sc) twice. (6 sts)
- Round 3: (1 sc, 1 inc, 1 sc) twice. (8 sts)
- Rounds 4-5: Sc around. (8 sts)
- Sl st, fasten off, leaving a tail for sewing.
3. Side Fins (Make 2, Light Blue)
- Round 1: 6 sc in MR. (6 sts)
- Round 2: (2 inc, 2 sc) twice. (10 sts)
- Round 3: (2 inc, 3 sc) twice. (14 sts)
- Rounds 4-6: Sc around. (14 sts)
- Round 7: (2 dec, 3 sc) twice. (12 sts)
- Fasten off, leaving a tail for sewing.
4. Face Mask (Beige/White, Make 2 Parts)
- Round 1: 8 sc in MR.
- Round 2: 3 inc, (1 sc, 2 ch, sl st in same st) 3 times, 2 sc, 1 ch, 1 dc.
- Fasten off, leaving one long tail for sewing.
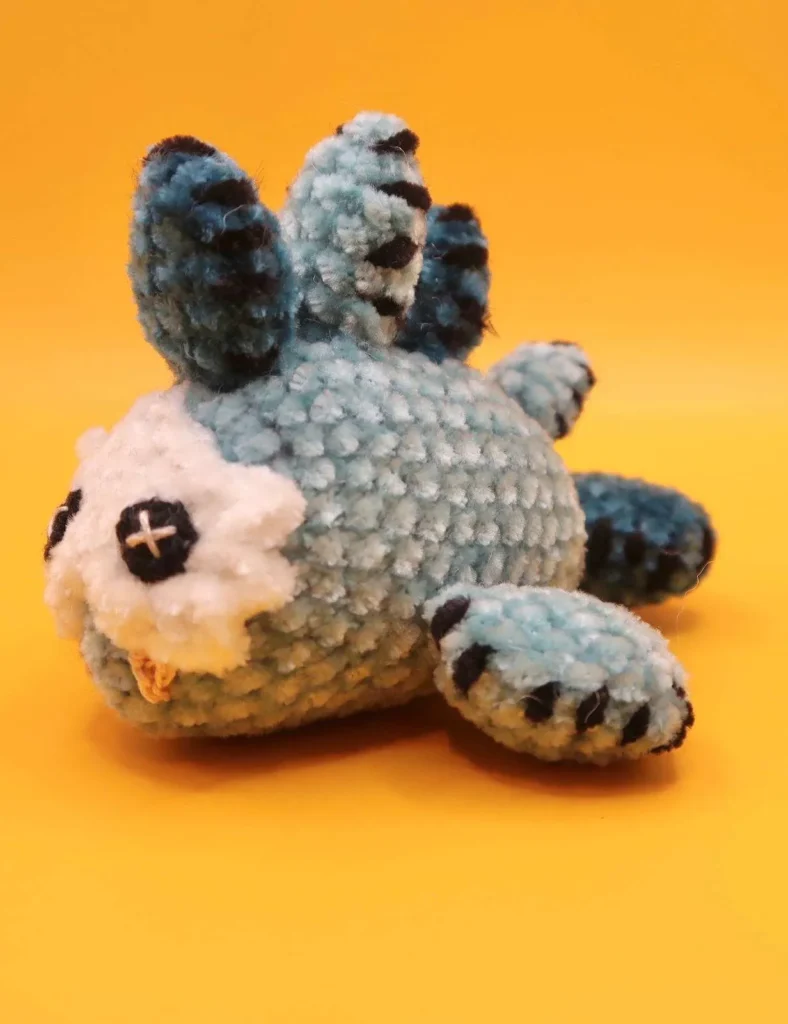
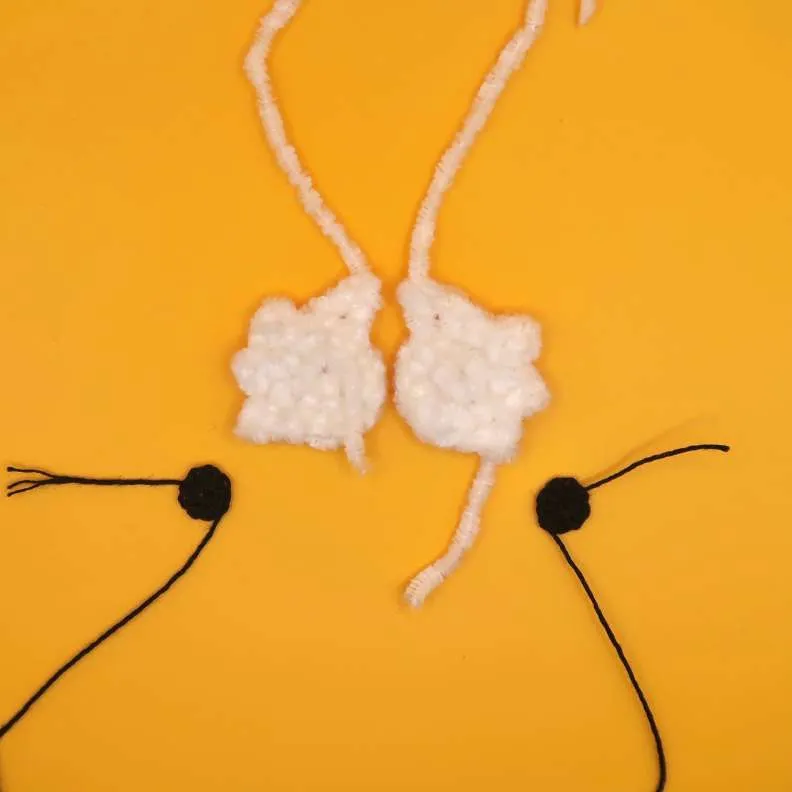
5. Eyes (Black, Make 2)
- Round 1: 8 sc in MR.
- Fasten off with an invisible finish.
Alternative: Use small buttons for eyes if preferred!
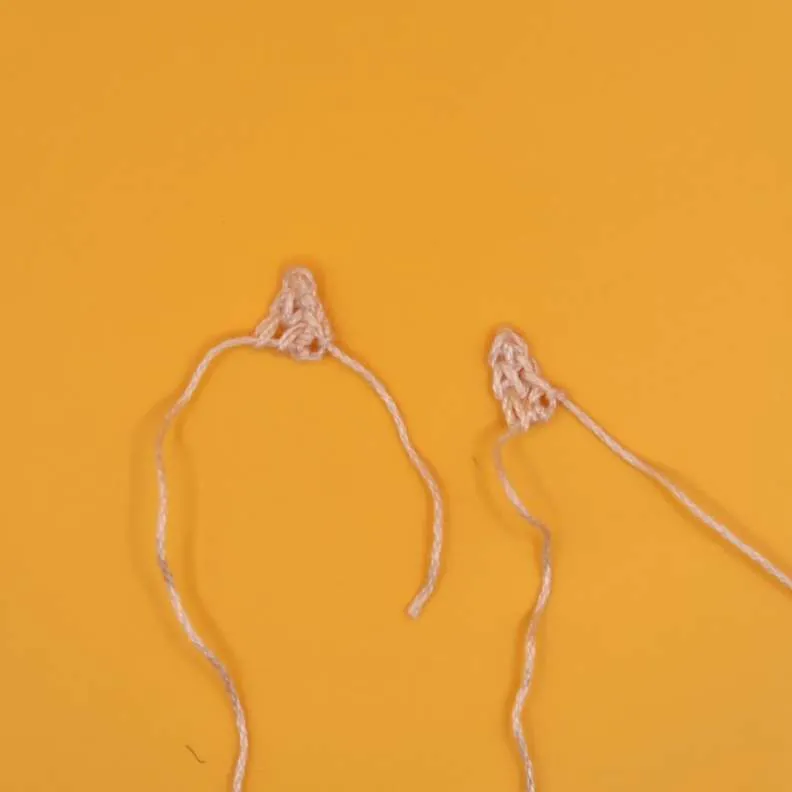
6. Fangs (White, Make 2)
- Row 1: Ch 3, turn.
- Row 2: Sl st in first st, 1 sc, 1 hdc.
- Fasten off, leaving a long tail for sewing and eye details.
Assembling Your Sand Seal
- Attach the Fins:
- Top fins: Place in order (big dark, big light, small dark, small light).
- Side fins: Position diagonally (front higher than back).
- Sew securely in place.
- Sew on the Face Mask:
- Pin the two mask pieces together (one right side up, one wrong side up).
- Sew together, closing any gaps.
- Add Eyes & Fangs:
- Sew eyes onto the mask.
- Use black yarn to embroider fin seams.
- Attach fangs at the bottom of the mask.
- Final Touches:
- Embroider “X” eyes (or attach buttons).
- Weave in all loose ends.
Tips for Success
- Velvet yarn can be slippery! Work slowly to avoid splitting stitches.
- Safety first: If making for young children, avoid safety eyes and use embroidery instead.
- Customize it! Try different colors to match your favorite in-game seals.
You Did It!
Your very own Sand Seal plushie is complete! Whether it’s sitting on your shelf, guarding your gaming setup, or being gifted to a fellow Zelda fan, this little guy is sure to bring joy