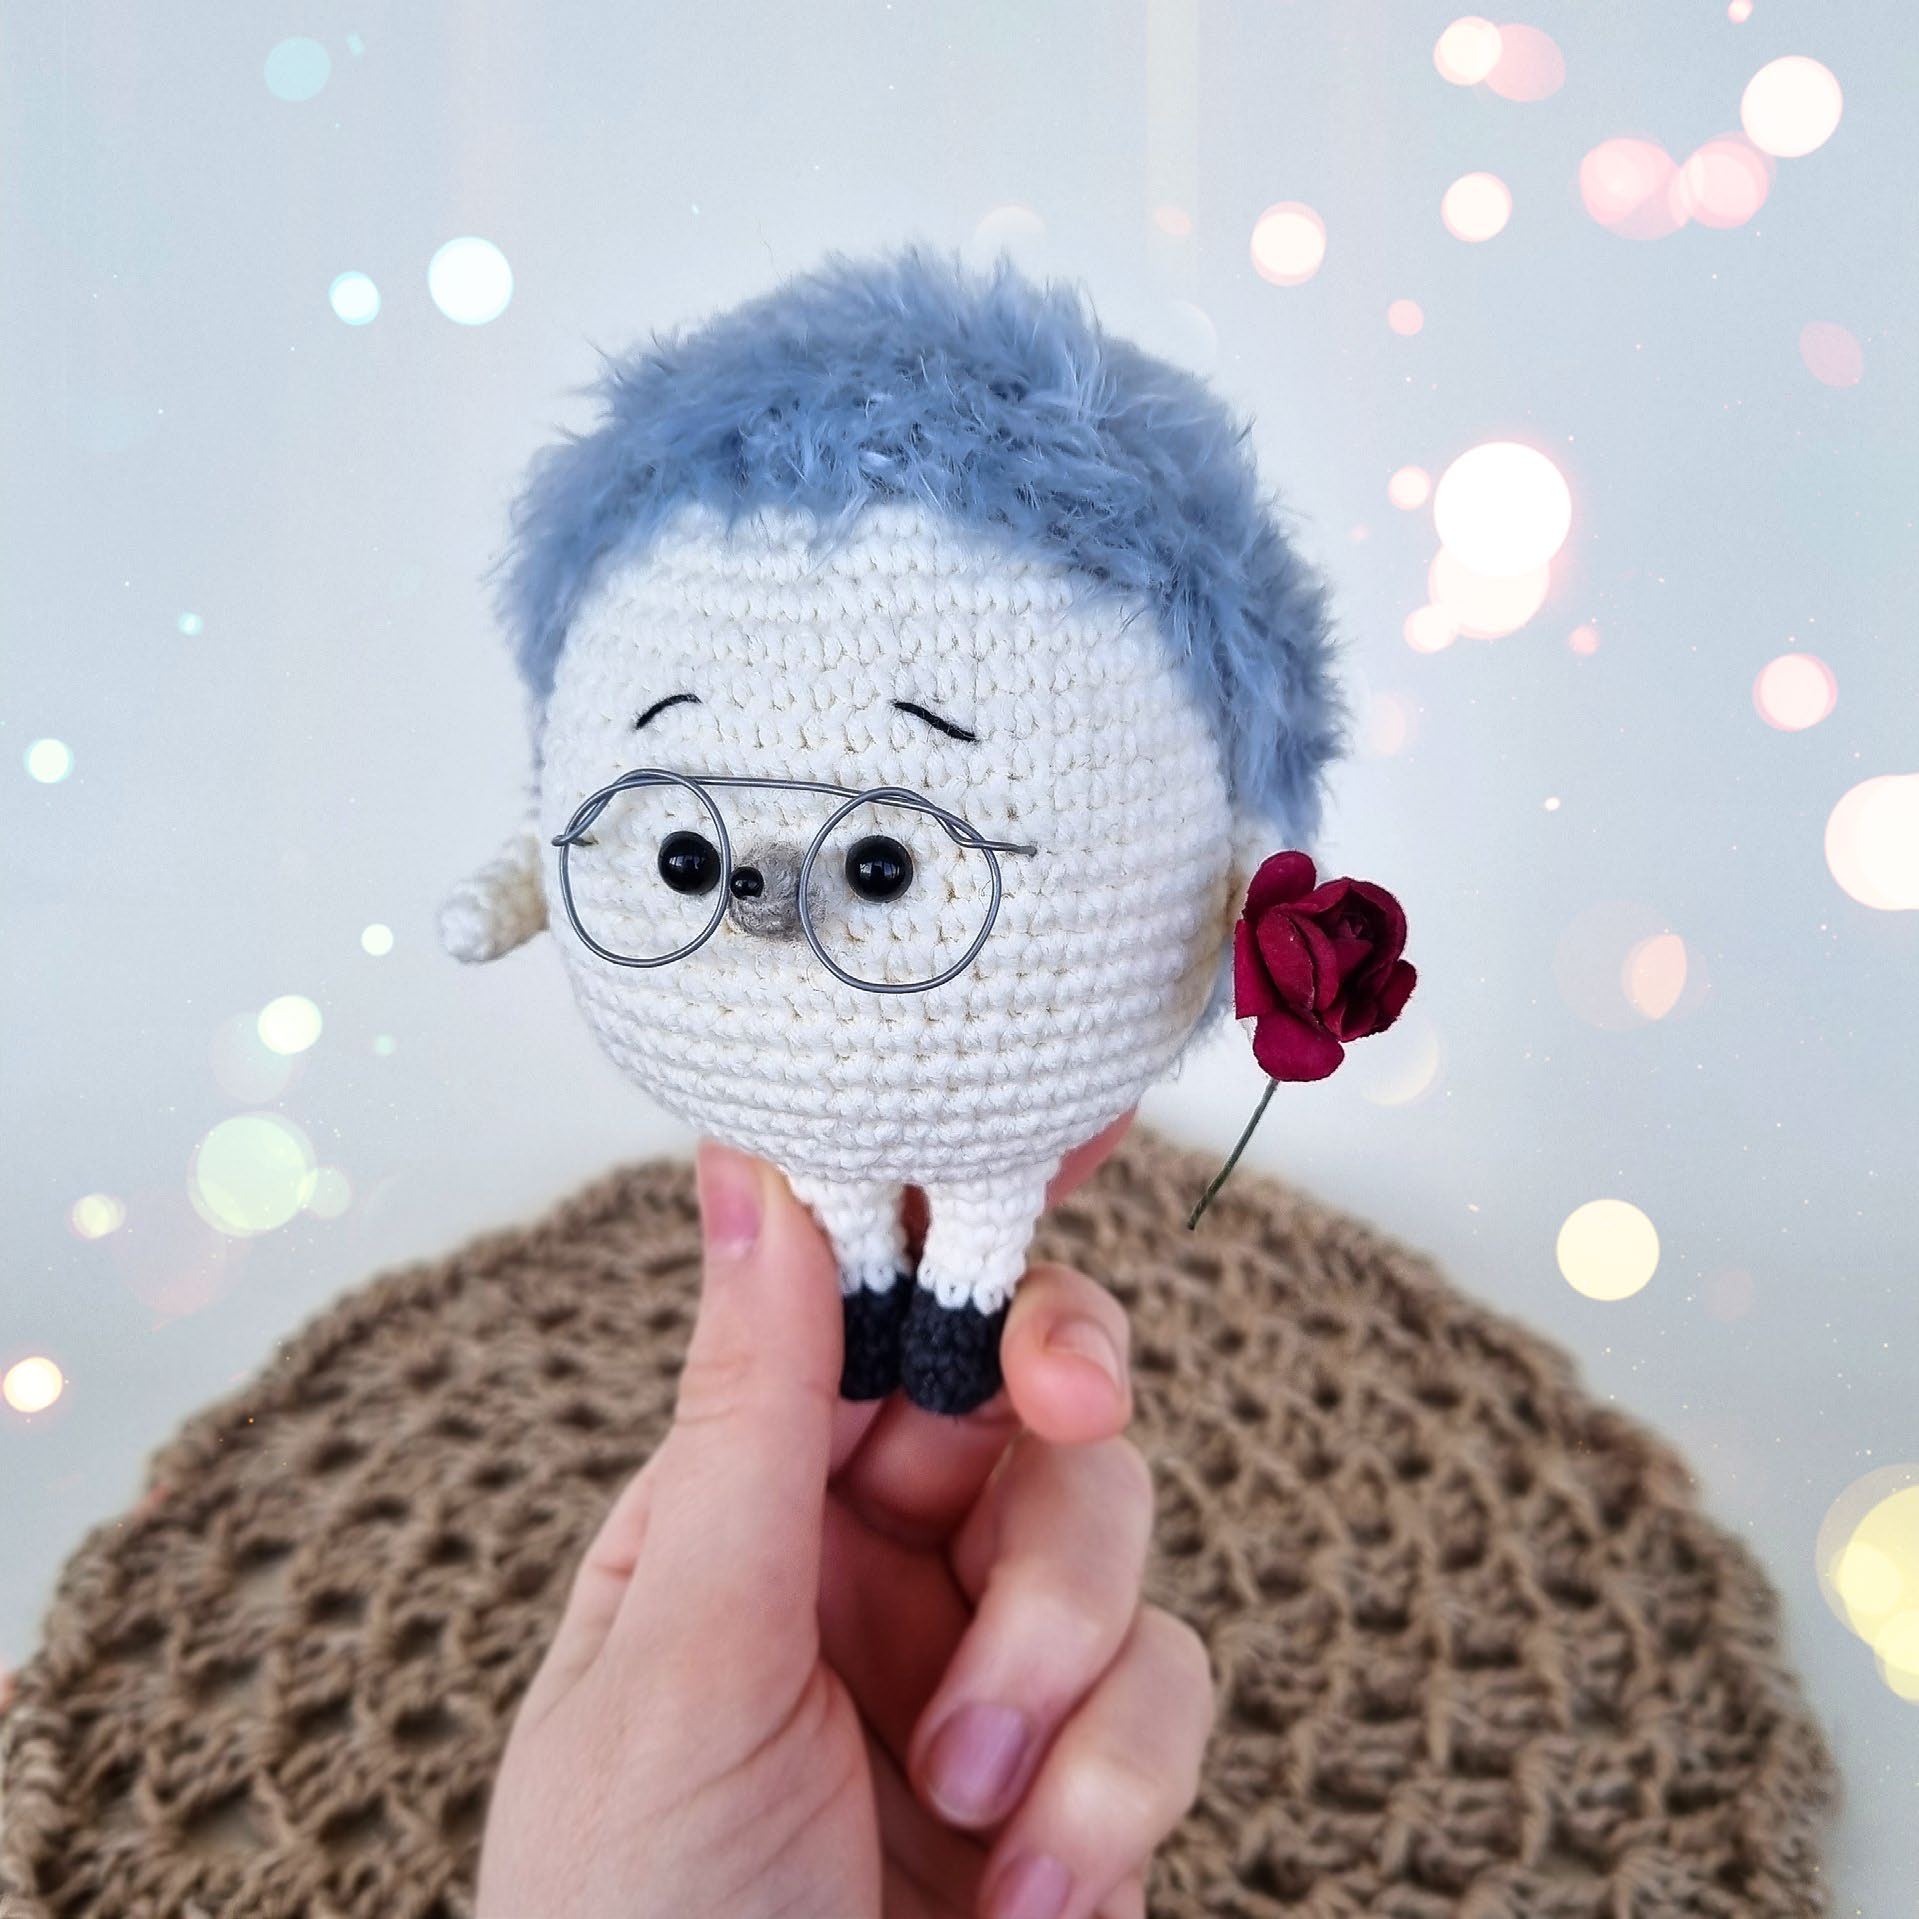
Spectacled Hedgehog: A Free Amigurumi Pattern
Hello, cozy crafters! 🧶
There’s something irresistibly charming about a tiny animal with personality—especially when it wears glasses! Today, I’m thrilled to share this free Spectacled Hedgehog amigurumi pattern with you. This little fellow stands at just 12cm tall and is full of character, from his fuzzy “grass” yarn spines to his perfectly round spectacles.
Whether you’re making this hedgehog for a book lover, a teacher, a friend, or just for yourself, he’s sure to bring a smile to everyone who sees him. With simple shaping and minimal color changes, this project is great for confident beginners ready to practice sewing small parts and adding cute details.
I’ve included step-by-step instructions for everything—from his tiny boots and poseable arms to his brushed-out spines and handmade wire glasses. Let’s pick up our hooks and make some prickly magic!
Materials You’ll Need
Yarn
- YarnArt Jeans (50g/160m) – approx. half a skein in beige/tan for the body
- Small amount of dark yarn for boots
- Kamtex “Cotton Grass” or similar fuzzy yarn for spines
- Black Iris thread for embroidery
Tools & Notions
- Crochet hooks: 1.5mm (nose), 2.0mm (body), 4.0mm (spines)
- Polyfill stuffing
- Two 6mm half-sphere beads for eyes
- One small black bead for nose
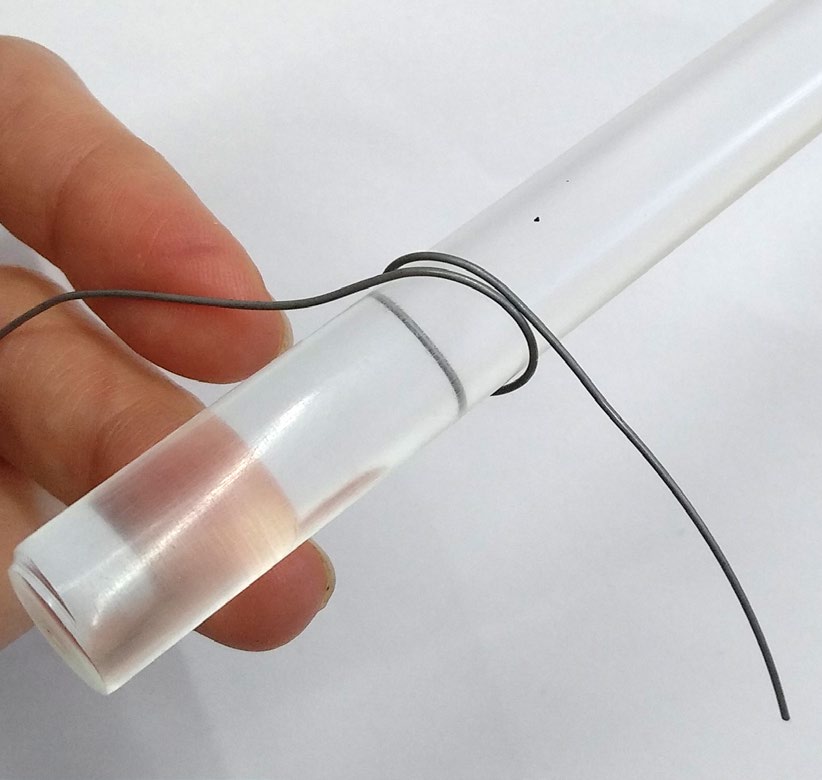
- Thin craft wire for glasses
- Tapestry needle
- Scissors
- Fabric glue (optional)
Skill Level
Beginner+
Finished Size
Approximately 12cm tall
Crochet Abbreviations
- ch = chain
- sc = single crochet
- inc = increase (2 sc in one stitch)
- dec = decrease (sc two together)
- sl st = slip stitch
- MR = magic ring
Pattern Instructions
Arms (Make 2)
Use main body color.
- R1: 3 sc in MR or 3 sc in 2nd ch from hook (3)
- R2: 3 inc (6)
- R3–R4: 6 sc
- R5: (sc, inc) x 3 (9)
- R6–R7: 9 sc
Do not stuff. Fold and join edges with 3 sc + 1 sl st. Leave long tail for sewing.

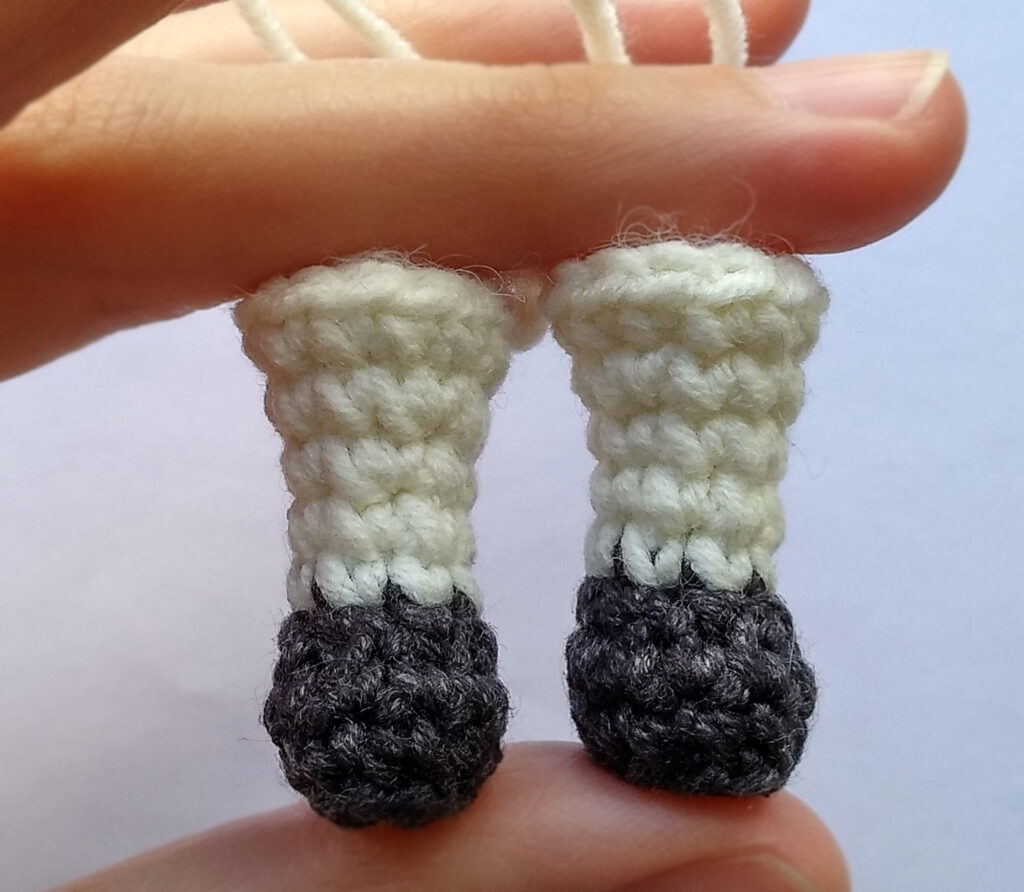
Legs (Make 2)
Start with dark yarn for boots.
- R1: Ch 4, inc in 2nd ch, 1 sc, 4 sc in last ch, 1 sc, inc along other side (10)
- R2: 10 sc in back loops only
- R3: 10 sc + 1 sl st (to shift round)
- R4: 2 sc, 3 dec, 2 sc (7)
Switch to main body color.
- R5–R6: 7 sc
- R7: 2 sc, inc, 3 sc, inc (9)
- R8: (2 sc, inc) x 3 (12)
- R9: 12 sc
Stuff lightly. Leave long tail for sewing.
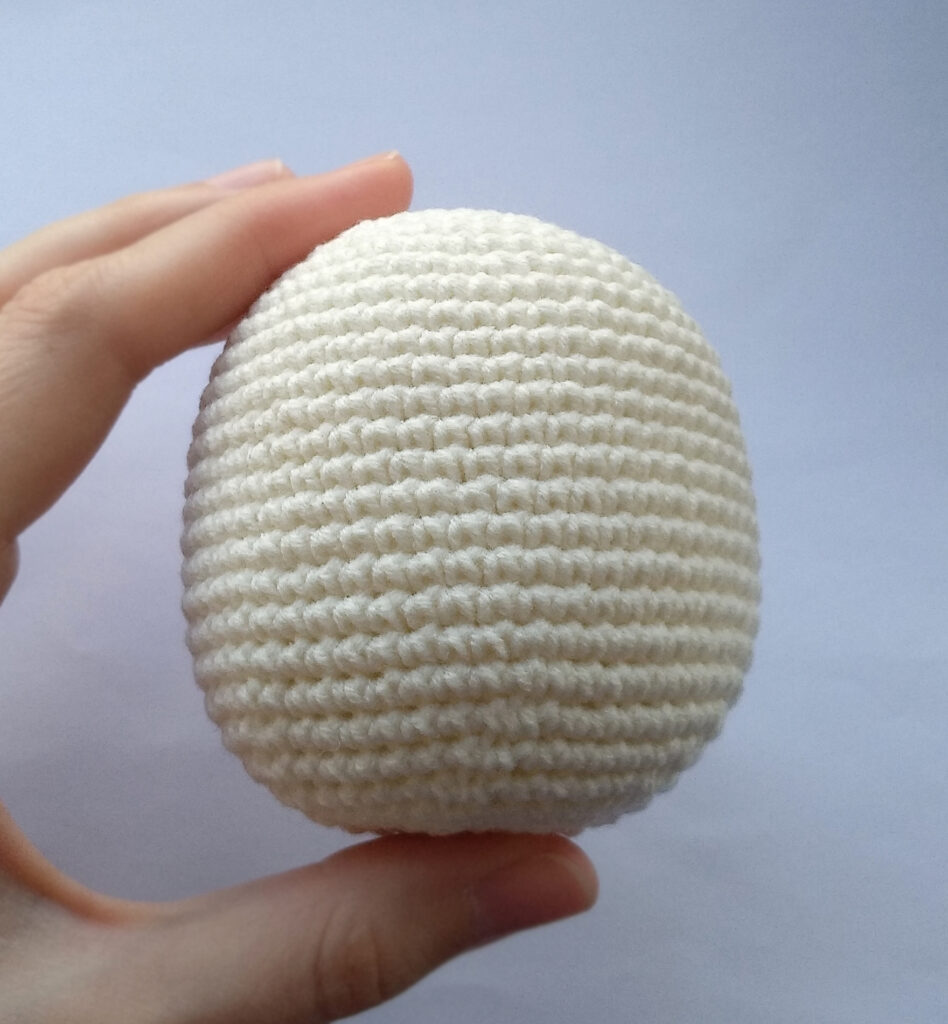
Body
Use main body color.
- R1: 6 sc in MR (6)
- R2: 6 inc (12)
- R3: (sc, inc) x 6 (18)
- R4: (2 sc, inc) x 6 (24)
- R5: (3 sc, inc) x 6 (30)
- R6: (4 sc, inc) x 6 (36)
- R7: (5 sc, inc) x 6 (42)
- R8: (6 sc, inc) x 6 (48)
- R9: (7 sc, inc) x 6 (54)
- R10–R22: 54 sc (13 rounds)
- R23: (7 sc, dec) x 6 (48)
- R24: (6 sc, dec) x 6 (42)
- R25: (5 sc, dec) x 6 (36)
- R26: (3 sc, dec) x 6 (24)
- R27: (2 sc, dec) x 6 (18)
- R28: (sc, dec) x 6 (12)
- R29: Dec to end
Stuff firmly as you go. Close opening and weave in ends.
Nose
Split yarn in half for finer texture. Use 1.5mm hook.
- R1: 6 sc in MR (6)
- R3: 9 sc
- R2: (sc, inc) x 3 (9)
Leave tail for sewing. Attach black bead to tip.
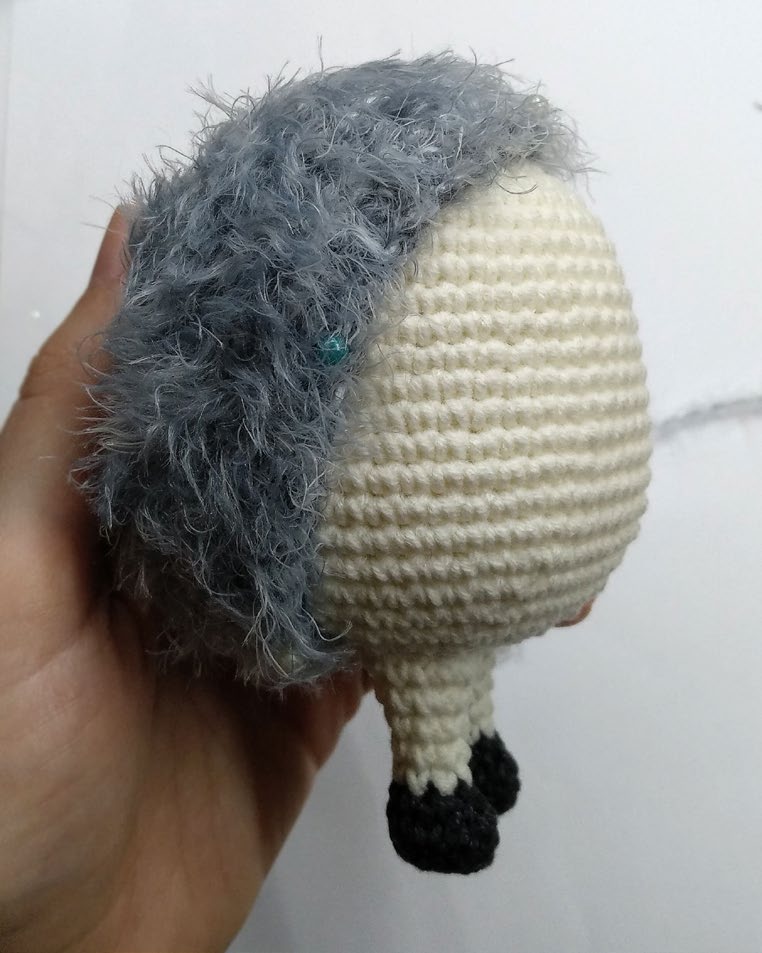
Spines
Use fuzzy “grass” yarn held double. Use 4.0mm hook.
- R1: Ch 9, inc, 6 sc, 4 sc in last ch, 6 sc, inc (20)
- R2: 2 inc, 6 sc, 4 inc, 6 sc, 2 inc (28)
- R3: (sc, inc) x 2, 6 sc, (sc, inc) x 4, 6 sc, (sc, inc) x 2 (36)
- R4: (inc, 2 sc) x 2, 6 sc, (inc, 2 sc) x 4, 6 sc, (inc, 2 sc) x 2 (44)
- R5–R9: 44 sc
Try on body; add more rows if needed. Leave tail for sewing.
Assembly & Finishing
Attach Pieces
- Spines: Sew along upper back of body.
- Legs: Attach to bottom front.
- Arms: Sew between rows 16–18 of the body.
- Nose: Sew above arms, adding a bit of stuffing for shape.
Brushing the Spines
Use a pet slicker brush or fine-tooth comb to gently brush out the fuzzy yarn. Be patient—fluff until spines are fuzzy and hedgehog-like!
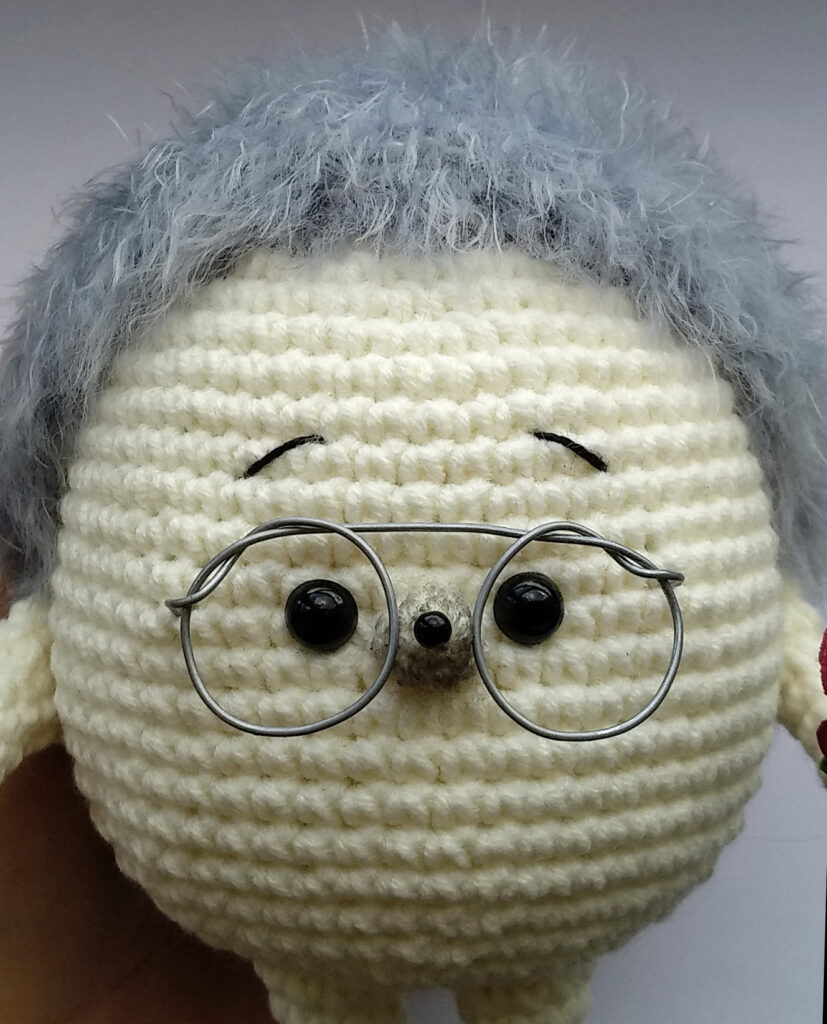
Face
- Glue half-sphere eyes on either side of the nose.
- Embroider eyebrows with black Iris thread.
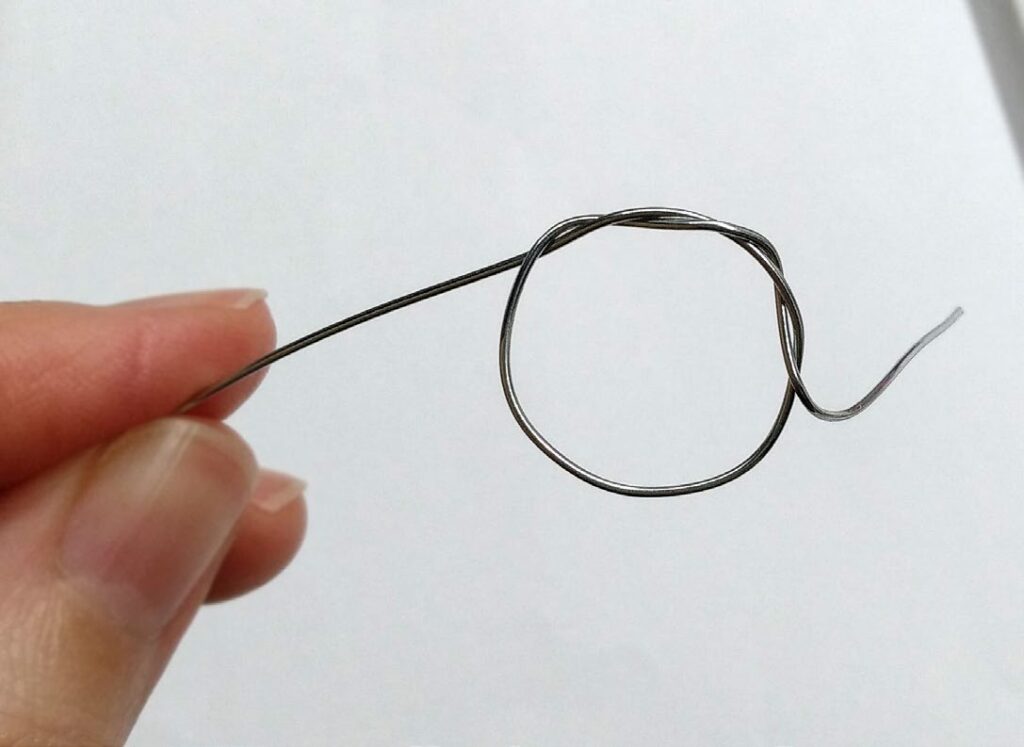
Wire Glasses
- Wrap wire around a round object (marker, dowel, etc.) to form two equal circles.
- Twist ends to form bridge and earpieces.
- Adjust to fit hedgehog’s face and gently press into place.

Tips for Success
- Keep stitches tight to prevent stuffing from showing.
- Use a smaller hook if your tension is loose.
- Brush spines gently to avoid breaking the yarn.
- Position glasses last so they don’t get in the way during assembly.
You’ve Made a Hedgehog!
Congratulations! You’ve just created the most scholarly little hedgehog in the amigurumi world 🎓🦔