Crochet Phoebe the Stegosaurus
Hello, hello, my delightful crafters! Are you ready for a prehistoric adventure right on your crochet hook? Today, we’re going way, way back in time to create the most charming little dino you ever did see: Phoebe the Stegosaurus!
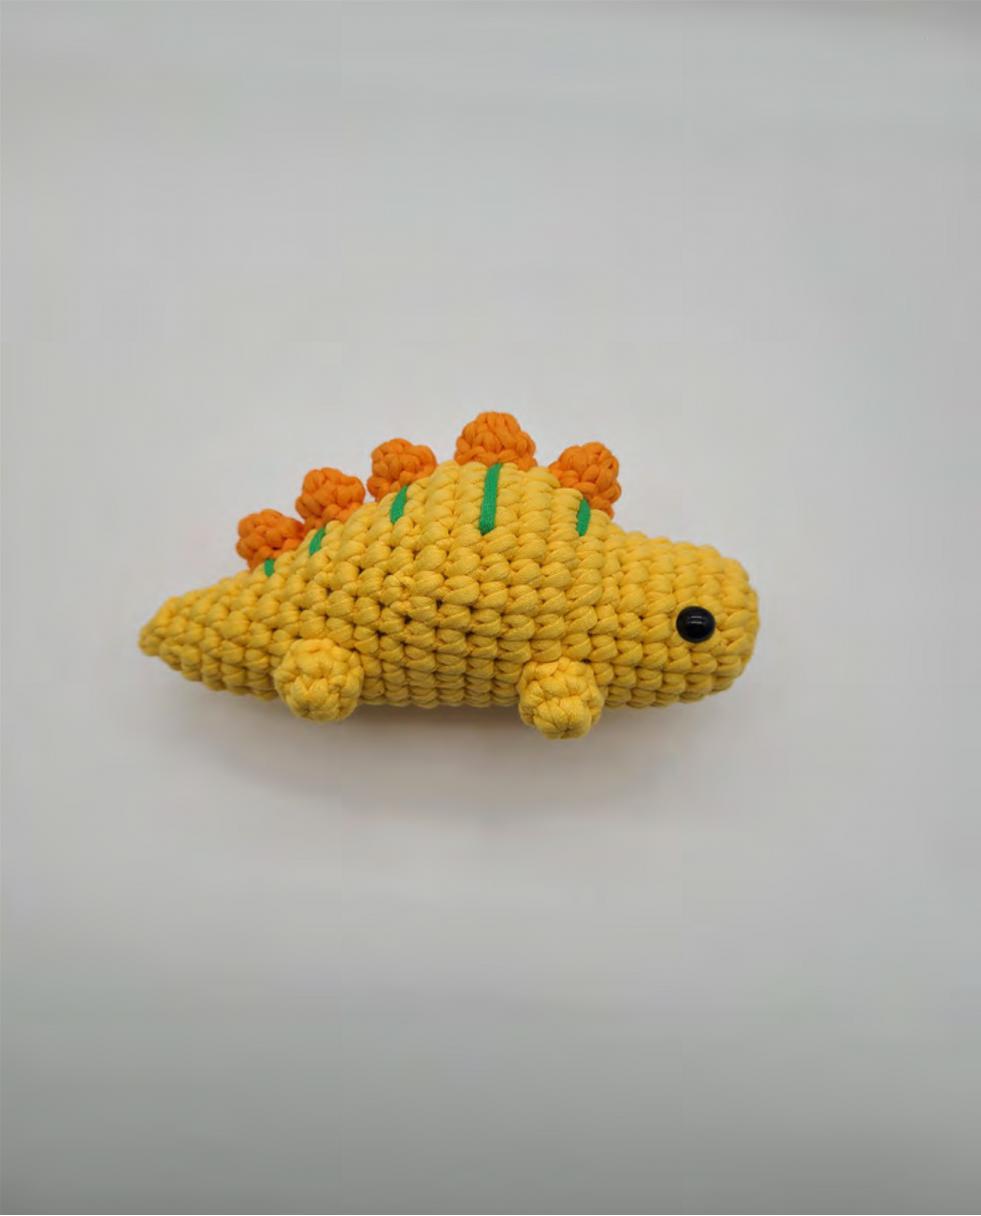
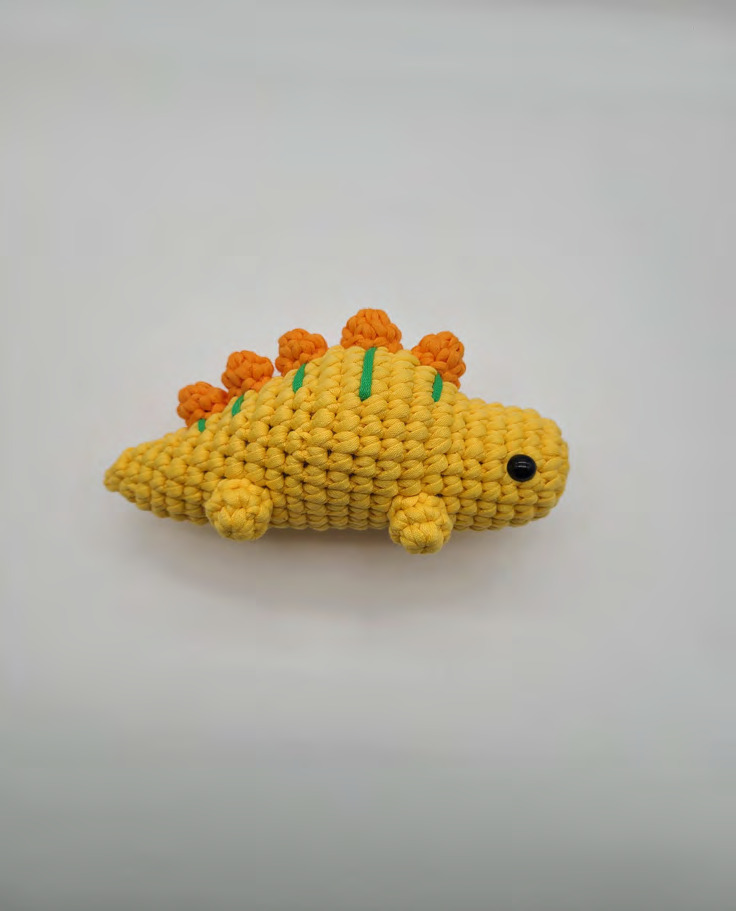
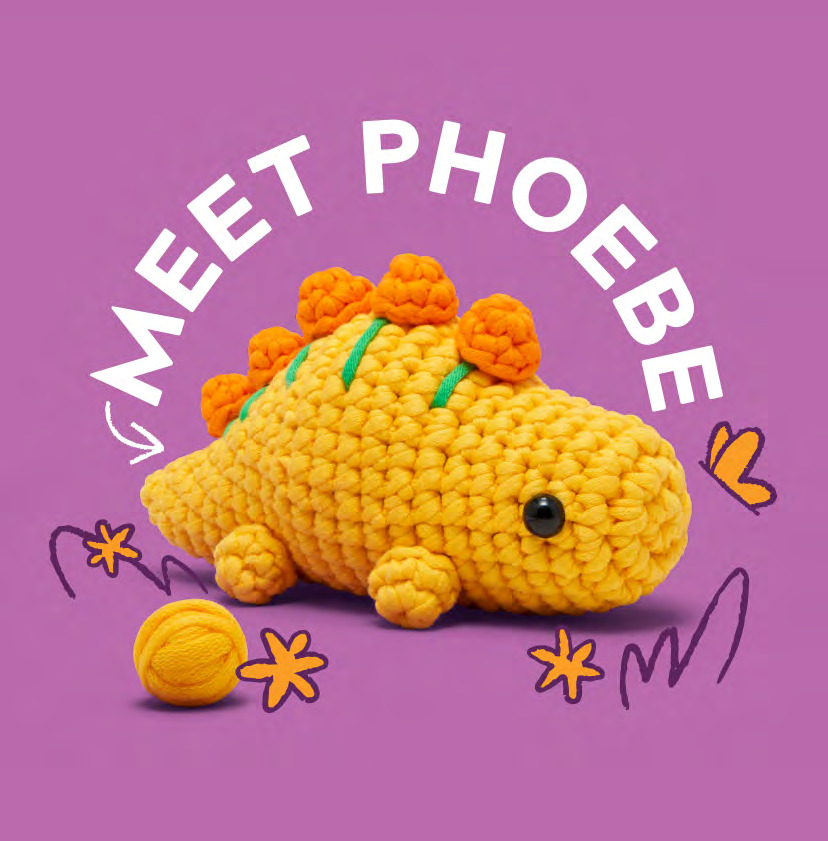
With her bright yellow body, cute orange spikes, and a lovely little row of green stripes, Phoebe is bursting with personality. She’s the perfect project to bring a smile to your face and a dose of whimsy to your craft room. This pattern is absolutely wonderful for beginners; it uses basic stitches and guides you through every step of creating her unique peanut-shaped body, sturdy little legs, and iconic back plates.
She’s the perfect size for little hands to play with or to proudly display on a shelf. Phoebe makes a fantastic gift for any dinosaur enthusiast, a wonderful baby shower present, or a cheerful project just for you! So, let’s grab our yarn and hop in our time machine to create a new (very old) friend
Materials You’ll Need to Crochet Phoebe
- Yarn: Medium-weight (worsted weight/aran) yarn in the following colors and approximate amounts:
- Yellow: 48 yards (comes with 3 handy stitch markers!)
- Orange: 8 yards
- Green: 1 yard
- Crochet Hook: 4mm (US Size G-6)
- Safety Eyes: 10mm pair
- Other Essentials:
- Tapestry needle
- Scissors
- Stuffing
- Stitch markers (included with your yellow yarn)
Crochet Abbreviations (US Terms)
This pattern is worked in continuous rounds (don’t join at the end of each round, just keep going!). Place a stitch marker in the first stitch of each round to keep your place.
- dec: (invisible) decrease
- inc: increase (2 single crochets in the same stitch)
- rnd: round
- sc: single crochet
- x [number]: repeat the instructions the specified number of times
Pattern Instructions
Head & Body (with Yellow Yarn)
We’ll make Phoebe’s head and body all as one cute, peanut-shaped piece!
- Rnd 1: Start with a magic ring and work 6 sc into the ring. (6 sts)
- Rnd 2: Make an inc in each stitch around. (12 sts)
- Rnd 3: [Sc in the next st, inc in the next st] repeat 6 times. (18 sts)
- Rnds 4–5: Sc in each stitch around for 2 rounds. (18 sts)
- Tip: Your piece will start to curl—this is totally normal! For a neater look, gently push the middle so it curves outward (the “right side”). Then keep crocheting.
- Rnd 6: [Sc in the next 5 sts, inc in the next st] repeat 3 times. (21 sts)
- Rnds 7–8: Sc in each stitch around for 2 rounds. (21 sts)
- Rnd 9: Sc in the next 7 sts, make 7 inc, sc in the next 7 sts. (28 sts)
- Rnd 10: Sc in each stitch around. (28 sts)
- Rnd 11: Sc in the next 13 sts, make 2 inc, sc in the next 13 sts. (30 sts)
- Rnds 12–14: Sc in each stitch around for 3 rounds. (30 sts)
- Rnd 15: Sc in the next 7 sts, dec, [sc in the next st, dec] repeat 5 times, sc in the next 6 sts. (24 sts)
- Rnds 16–17: Sc in each stitch around for 2 rounds. (24 sts)
- Rnd 18: Sc in the next 7 sts, dec, [sc in the next st, dec] repeat 3 times, sc in the next 6 sts. (20 sts)
Attach the Eyes & Stuff: The beginning of your rounds is the belly! Attach the 10mm safety eyes between Rounds 4 and 5, with about 8 stitches of space between them at the top of the head.
- !! Important Safety Note !! If Phoebe is for a baby or a pet, please embroider the eyes with yarn instead of using safety eyes.
Now, start stuffing the head, shaping it like a little peanut. Continue to add stuffing as you crochet the remaining rounds.
- Rnd 19: Sc in each stitch around. (20 sts)
- Rnd 20: Sc in the next 6 sts, make 4 dec, sc in the next 6 sts. (16 sts)
- Rnd 21: Sc in each stitch around. (16 sts)
- Rnd 22: Sc in the next 4 sts, make 4 dec, sc in the next 4 sts. (12 sts)
- Rnd 23: Sc in each stitch around. (12 sts)
- Rnd 24: [Sc in the next st, dec] repeat 4 times. (8 sts)
- Rnd 25: Sc in the next 2 sts, make 2 dec, sc in the next 2 sts. (6 sts)
- Fasten Off: Cut the yarn, leaving a long tail. Thread your tapestry needle and weave the tail through the front loops of the remaining 6 stitches. Pull tightly to close the hole. Weave in the end to secure
Legs (make 4 with Yellow Yarn)
Phoebe needs four sturdy legs to stomp around on!
- Rnd 1: Start with a magic ring and work 6 sc into the ring. (6 sts)
- Rnd 2: [Sc in the next 2 sts, inc in the next st] repeat 2 times. (8 sts)
- Fasten Off: Invisible fasten off, leaving a long tail for sewing.
Attaching the Legs:
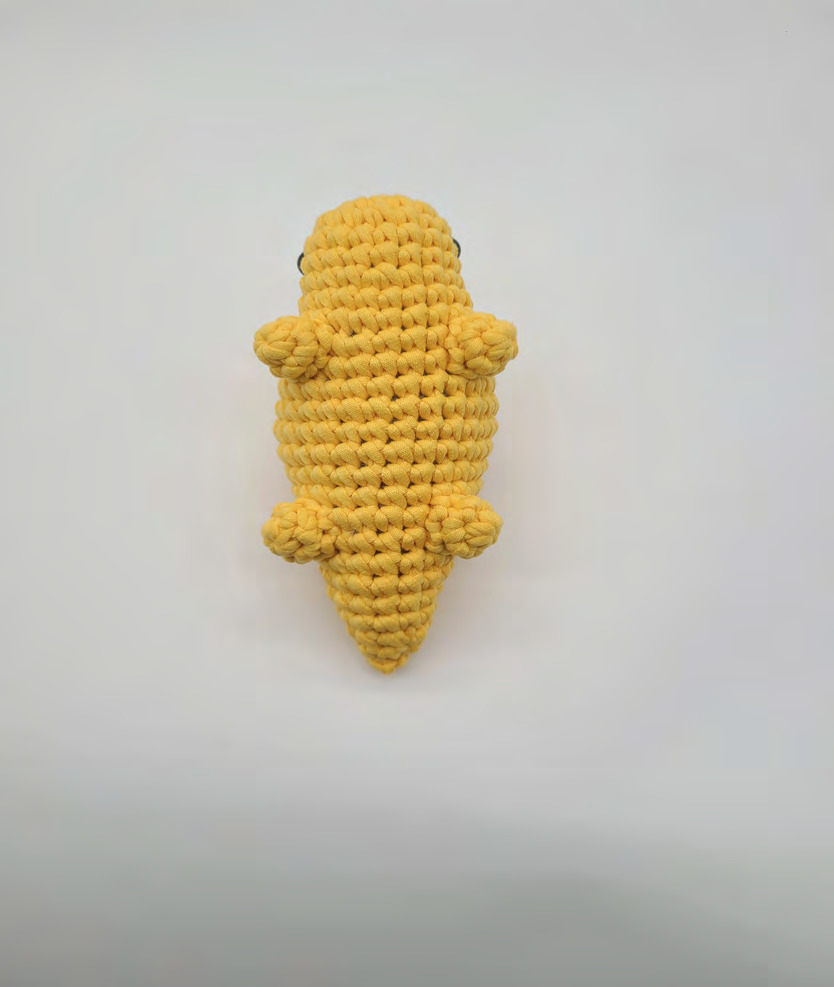
- Front Legs: Sew the first pair of legs centered on either side of the belly, spanning from Round 9 to Round 10. Leave about 5 stitches of space between them.
- Back Legs: Sew the second pair of legs centered on either side near the belly and tail, spanning from Round 17 to Round 18. Leave about 4 stitches of space between them.
Hide all the yarn tails inside the body.
Back Stripes (with Green Yarn)
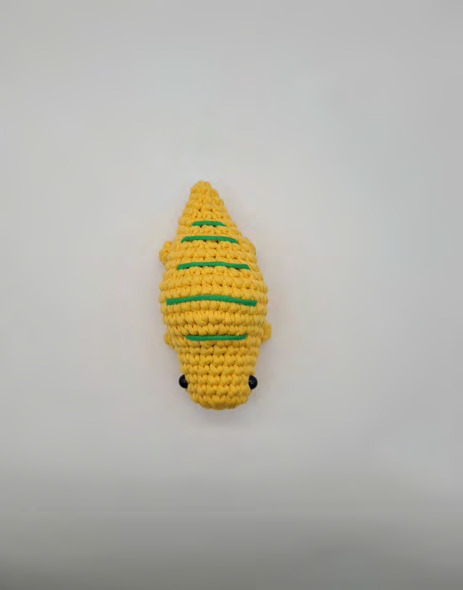
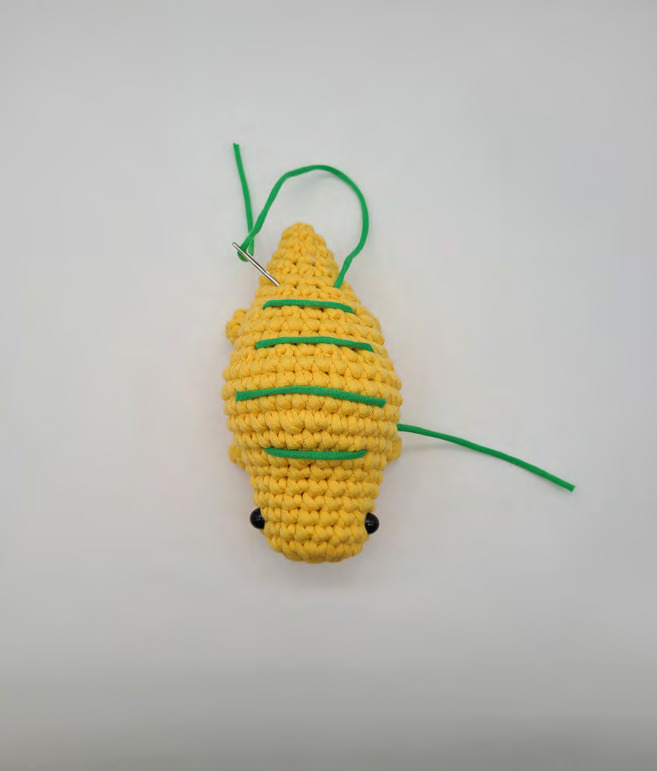
Let’s give Phoebe her signature markings! We’ll embroider five lines centered on her back.
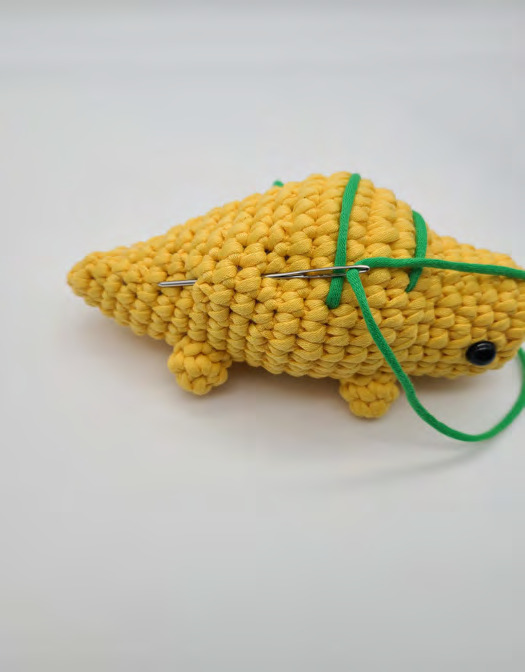
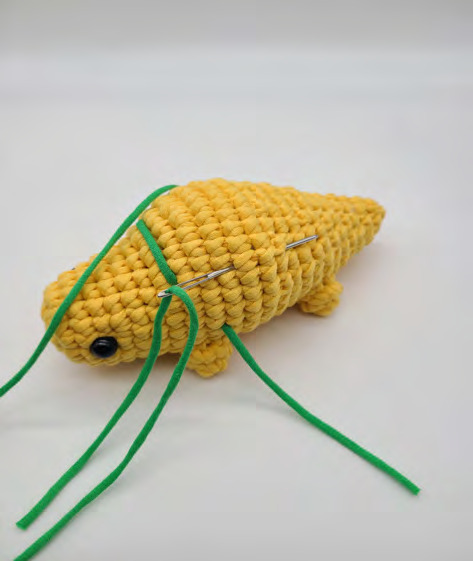
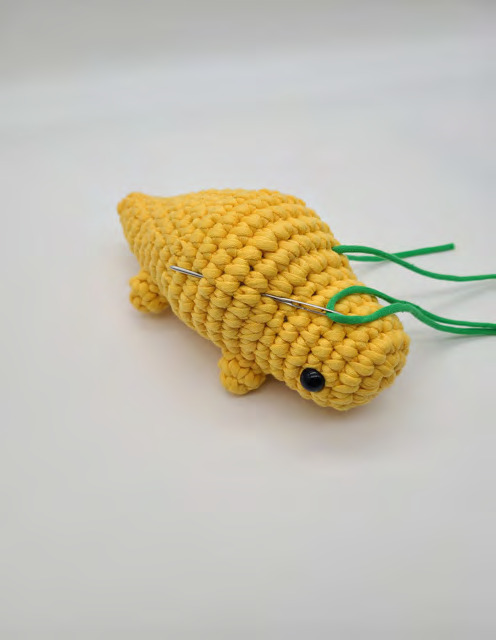
- Thread a very long (two arm’s length) piece of green yarn onto your needle. From the right side of the body, push the needle through and bring it out between Rounds 9 and 10, about 3 stitches to the left of the right eye and 5 rounds up from the belly. Leave a 6-inch tail.
- To form the first stripe, insert the needle 8 stitches to the left and pull it out between Rounds 12 and 13, 3 rounds up and 1 stitch to the left.
- For the next stripe, insert the needle 10 stitches to the right and pull it out 3 rounds up between Rounds 15 and 16.
- For the third stripe, insert the needle 6 stitches to the left and pull it out 3 rounds up between Rounds 18 and 19.
- For the fourth stripe, insert the needle 5 stitches to the right and pull it out 2 rounds up and 1 stitch to the left between Rounds 20 and 21.
- For the final short stripe, insert the needle 3 stitches to the left.
- Now, bring your needle out through the exact same hole you started from, so both yarn tails are together.
- Tie the two tails together in a firm knot close to the body and hide the ends inside.
Spikes (with Orange Yarn)
Large Spikes (make 2):
- Rnd 1: 5 sc in a magic ring. (5 sts) Note: The pattern PDF says to start with 6, but the total for Rnd 2 only adds up if you start with 5. This has been adjusted for accuracy.
- Rnd 2: Sc in the next st, inc, sc in the next 2 sts, inc. (7 sts)
- Fasten off, leaving a long tail for sewing. Sew these two larger spikes right next to each other on the back, spanning Rounds 9 to 13.
Small Spikes (make 3):
- Rnd 1: 5 sc in a magic ring. (5 sts)
- Rnd 2: Sc in the next st, inc, sc in the next 2 sts, inc. (7 sts)
- Fasten off, leaving a long tail for sewing. Sew these three smaller spikes in a row behind the large ones, spanning Rounds 15 to 21.
Hide all the yarn tails inside the body after sewing.


