Adorable Red Devil Amigurumi: Free Crochet Pattern for Beginners
Introduction: Meet Your New Playful Pal
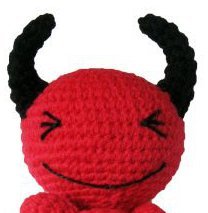
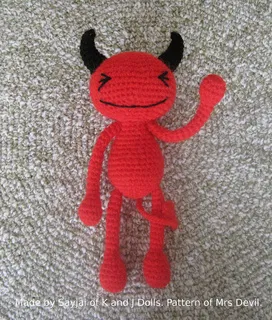
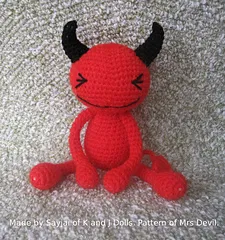
Looking for a fun and slightly mischievous crochet project? This Red Devil Amigurumi is just the thing! Designed by Mrsdevil and translated by Sayjai, this little devil is full of charm—perfect for Halloween decorations, imaginative play, or even as a quirky gift for someone who loves a bit of whimsy.
This pattern is great for beginners who are comfortable with basic stitches like single crochet (sc) and increasing/decreasing. The instructions are worked in continuous rounds, so no need to worry about joining at the end of each row—just follow the magic!
Whether you’re making this for a spooky season display or just because (who doesn’t need a tiny red devil cheering them on?), this project is quick, rewarding, and oh-so-adorable. Plus, it’s a fantastic way to practice shaping and assembly for amigurumi.
So grab your red and black yarn, a cozy cup of tea, and let’s bring this little devil to life—one stitch at a time!

Materials You’ll Need
Here’s what you’ll need to get started:
- Yarn:
- 4-ply yarn in red (main body)
- 4-ply yarn in black (horns and details)
- Crochet Hook: 3.00 mm
- Stuffing: Polyester fiberfill
- Needles & Notions:
- Tapestry needle (for sewing parts together)
- Black embroidery floss (for eyes and mouth)
- Optional: Stitch marker (to keep track of rounds)
Crochet Abbreviations (US Terms)
Here’s a quick cheat sheet for the stitches used in this pattern:
- ch = chain
- sc = single crochet
- st = stitch
- sl st = slip stitch
- hdc = half double crochet
- dc = double crochet
- tog = together (decrease)
Note: This pattern is worked in continuous rounds—no joining at the end of each round unless specified
Finished Size
Your Red Devil amigurumi will be small and huggable, roughly 4–6 inches tall depending on your tension.
Step-by-Step Crochet Instructions
1. The Head (Red Yarn)
We’ll start with the head, working in a spiral.
- Rnd 1: Start with a magic ring (or ch 2, then 6 sc in the second ch from hook). [6]
- Rnd 2: 2 sc in each st around. [12]
- Rnd 3: (1 sc, 2 sc in next st) around. [18]
- Rnd 4: (2 sc in next st, 1 sc in next 2 sts) around. [24]
- Rnd 5-9: Continue increasing until you reach 54 sts (see full pattern for exact counts).
- Rnd 10-12: Sc in each st around (no increases).
- Rnd 13-18: Begin decreasing until you have 18 sts left. Sl st to join, fasten off.
- Stuff firmly before closing.
2. The Body (Red Yarn)
Now, let’s make the body—similar to the head but shorter.
- Rnd 1: Ch 2, 6 sc in second ch. [6]
- Rnd 2: 2 sc in each st. [12]
- Rnd 3: (1 sc, 2 sc in next st) around. [18]
- Rnd 4-5: Continue increasing to 30 sts.
- Rnd 6-9: Sc in each st around (no shaping).
- Rnd 10-18: Decrease and maintain rounds (see full pattern).
- Stuff lightly, then sew the body to the head.
3. Arms & Legs (Make 2 Each, Red Yarn)
Arms:
- Rnd 1: 6 sc in magic ring. [6]
- Rnd 2: 2 sc in each st. [12]
- Rnd 3-4: Sc in each st.
- Rnd 5: Decrease to 6 sts, stuff only the hands.
- Rnd 6-21: Sc in each st. Fasten off, leaving a tail to sew onto the body.
Legs:
- Rnd 1: 6 sc in magic ring. [6]
- Rnd 2: 2 sc in each st. [12]
- Rnd 3-6: Sc in each st.
- Rnd 7: Decrease to 6 sts, stuff only the feet.
- Rnd 8-20: Sc in each st. Fasten off, leaving a tail to sew.
4. Horns (Make 2, Black Yarn)
- Rnd 1: 4 sc in magic ring. [4]
- Rnd 2-9: Follow shaping increases (see full pattern).
- Stuff lightly, sew onto the top of the head.
5. Tail (Red Yarn)
- Work in rows:
- Row 1: Ch 2, 3 sc in second ch.
- Row 2-4: Increase and shape with sc, hdc, and dc stitches.
- Ch 25-30 for the tail length, then sew onto the back of the body.
Finishing Touches
- Embroider the Eyes & Mouth
- Use black embroidery floss to stitch playful eyes and a mischievous grin.
- Sew All Parts Together
- Attach arms to the sides of the body.
- Sew legs at the bottom.
- Position horns on top of the head.
- Fluff & Pose!
- Adjust stuffing as needed and bend the arms/legs for extra personality.
Tips for Beginners
- Magic Ring Trick: If you’re new to starting in the round, check out a quick tutorial—it makes a neater beginning!
- Stuffing Balance: Don’t overstuff small parts like hands/feet, but make sure the head is firm.
- Stitch Markers Help! Mark the first stitch of each round to avoid losing count.
Final Thoughts
And there you have it—your very own Red Devil Amigurumi! This little guy is full of character and makes a fantastic gift, decoration, or desk buddy.
If you make one, I’d love to see your creation! Tag me on social media or share in the comments—crocheters are the best at spreading creativity and joy.